Media
The Media section is a Digital Asset Management (DAM) environment dedicated to managing digital files. It is presented as a nested folder system within which you can organize the files that flow into the digital archive.

Within this section, files can be organized, described, and tagged, and can be linked to the records created in the Objects section.
File management
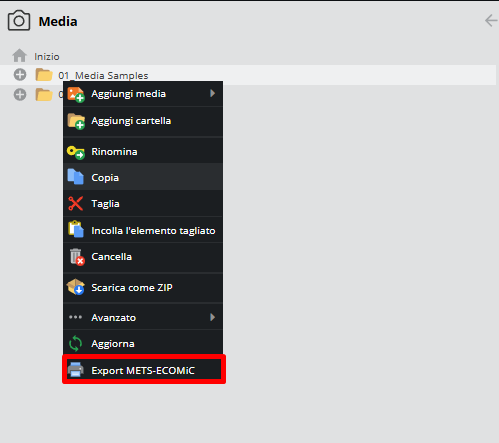
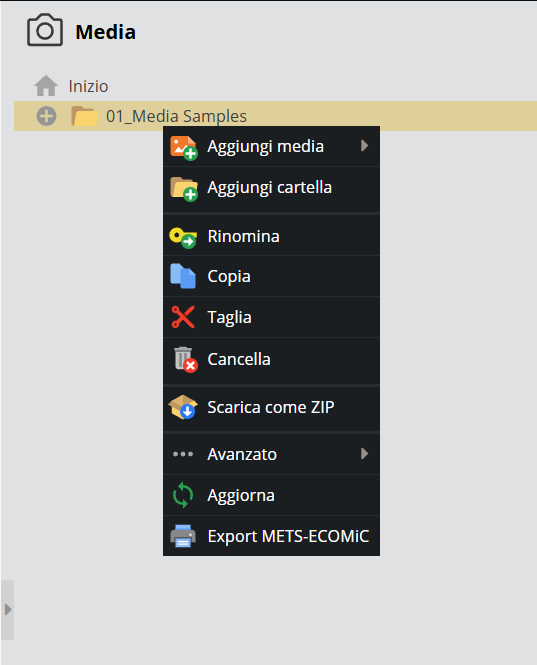
Files and folders can be added to the system via direct upload from the local file system or using the drag-and-drop (drag & drop) function. By right-clicking on an existing folder or on the “home” (Start) icon, the user can access the menu and perform a series of operations.
Uploading files or folders
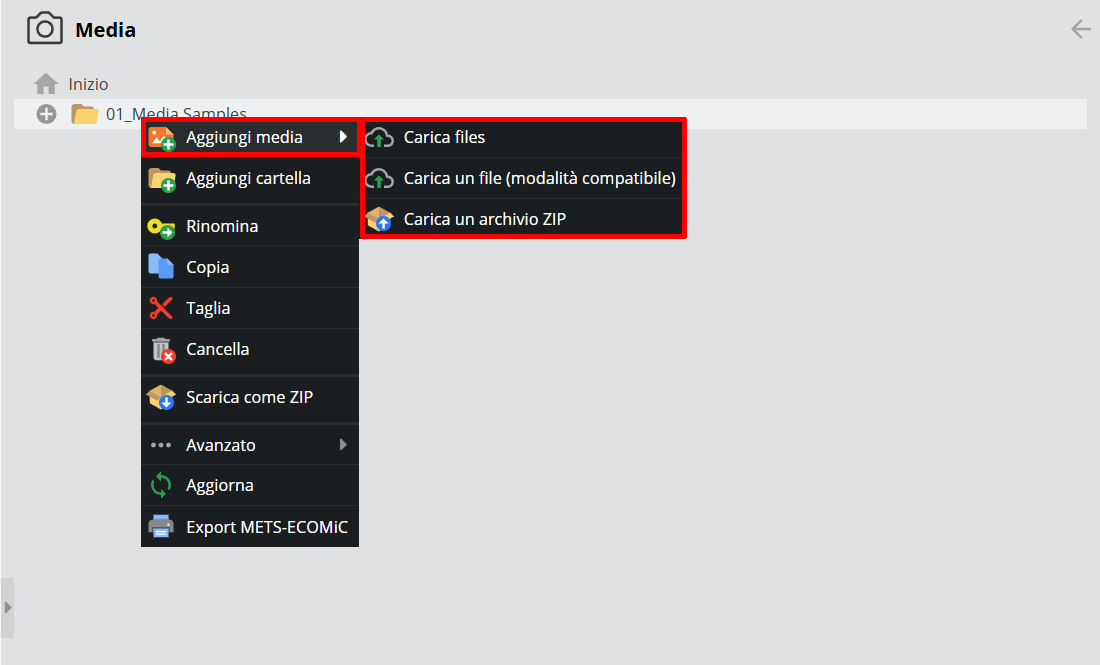
Using the “Add media” function, select and upload files or .zip folders.
Dragging and dropping (drag & drop) is the preferred method when importing entire folder structures in a single operation.
Note that, for large files, processing times may be extended as the system generates a medium-resolution preview for web viewing during the upload.
Cut/Paste
Once the folder system or individual files have been uploaded, they can be reorganized. One method for moving items within the tree structure is using the cut/paste commands: place the cursor over the item you want to move, right-click, and select “Cut” from the menu.
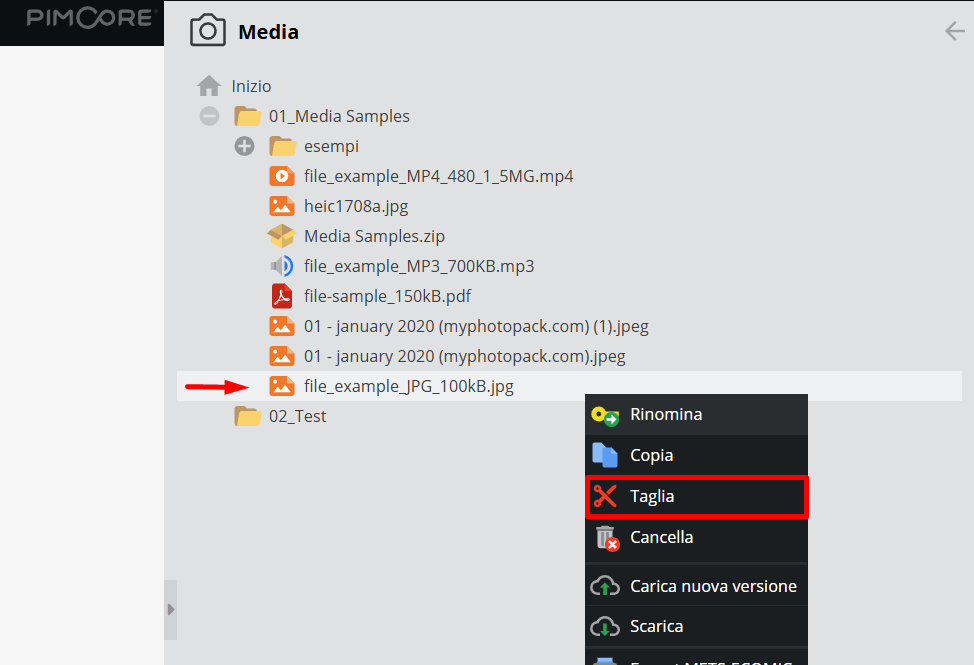
Navigate to the destination folder, right-click, and select “Paste cut item”.
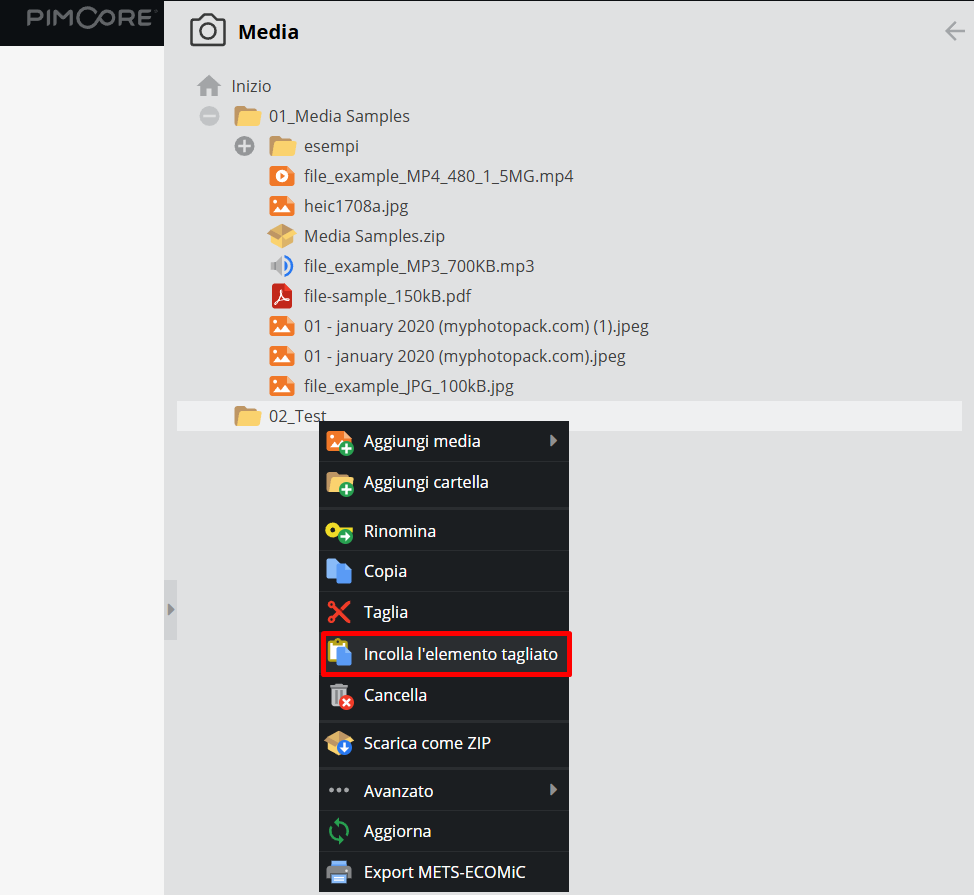
Move
As an alternative to the cut/paste command, you can move items by dragging them (drag & drop) directly to the desired location in the tree structure: to move a single item, simply place the cursor on the file or folder you want to move and drag it to the desired position.
You can also drag a selection of contiguous files or items: simply click on the first item, hold down the Shift key, click on the last item to include all intermediate files, and then proceed to drag.
Where moving non-consecutive items is required, you can use the advanced “Search & Move” functionality.
Go to the destination folder, right-click, and select Advanced > Search & Move from the menu.
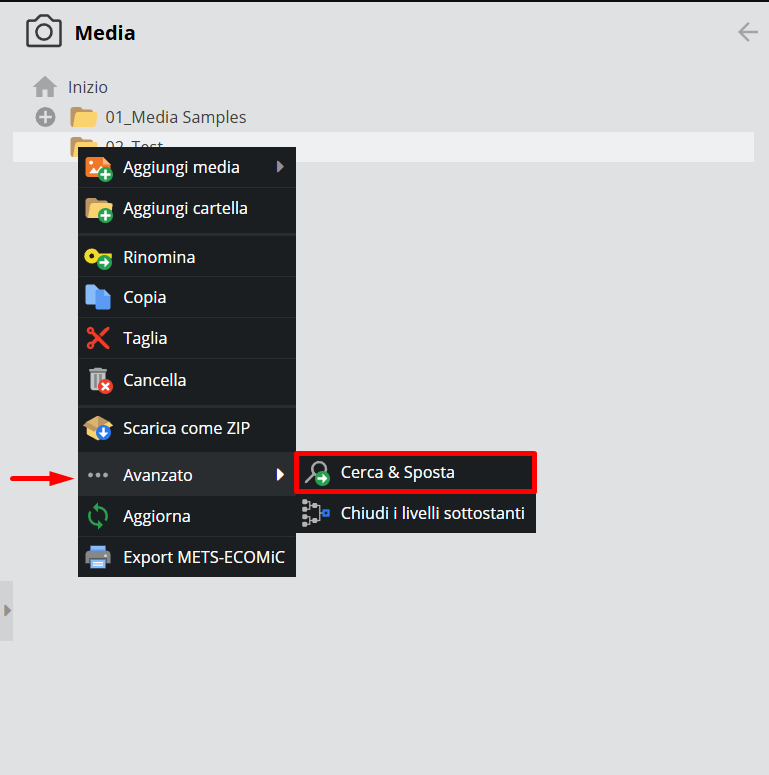
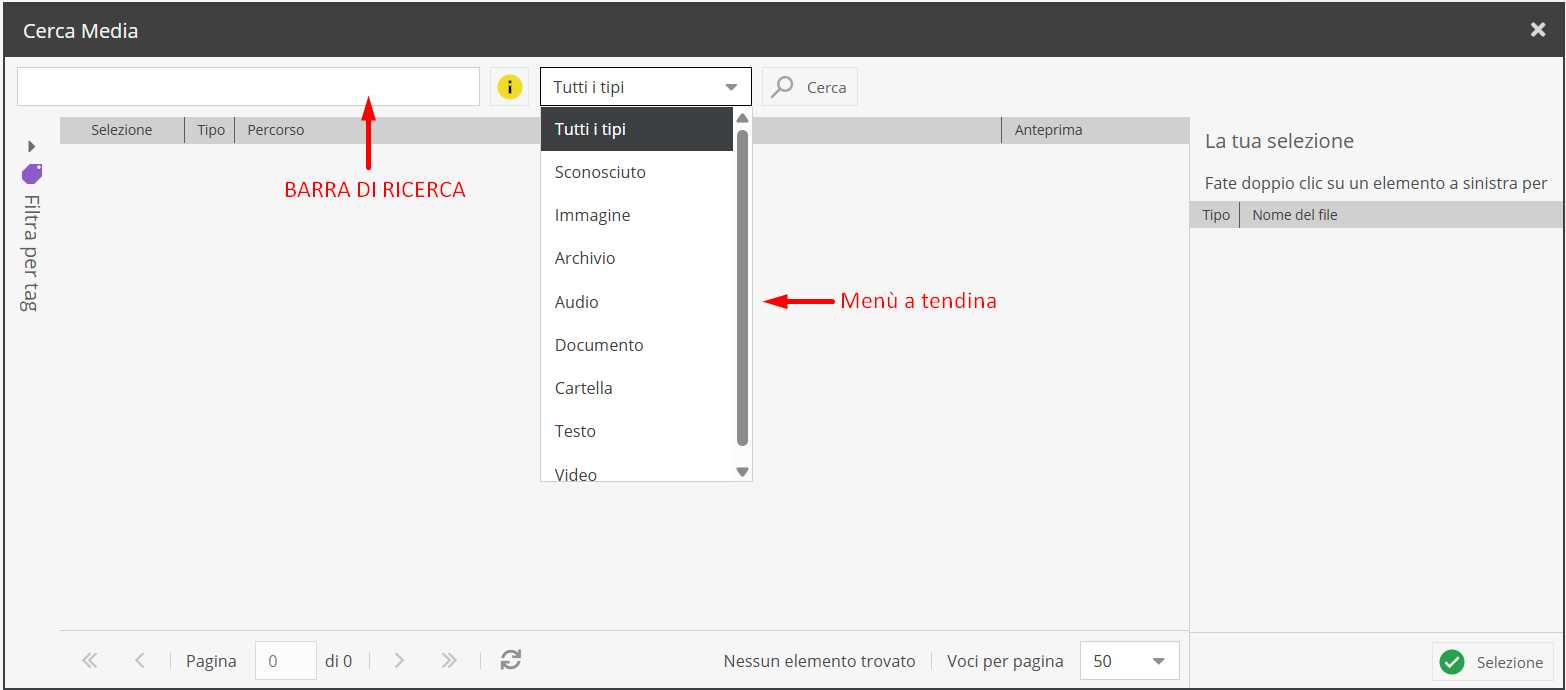
This operation allows searching across the entire Media section.
The search can be refined by keyword (to be entered in the search bar) and/or by format type from the drop-down menu, classified as follows:
-
All types: searches files and folders in any format
-
Image: searches files in .tiff, .jpg, .png, etc. format
-
Archive: searches files uploaded as .zip
-
Audio: searches .mp3, .avi, etc. files
-
Document: searches .pdf files
-
Folder: queries folder names exclusively.
-
Text: searches .docx, .txt, etc. files
-
Video: searches .mp4, .mov, etc. files
noteUploading zipped folders is only possible via the drag-and-drop (drag & drop) functionality from your repository. The folder will not be viewable on Pimcore.
Once the search mode is selected, click on the “Search” icon.
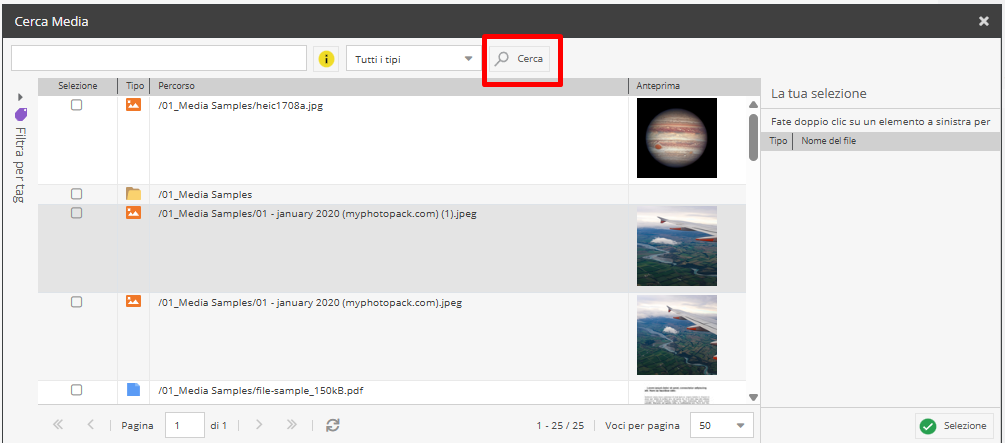
At this point, you can define the items to be moved by selecting them in their respective checkboxes, visible in the “Selection” column. Once the checkboxes are selected, the items will be displayed in real time in the “Your selection” area.
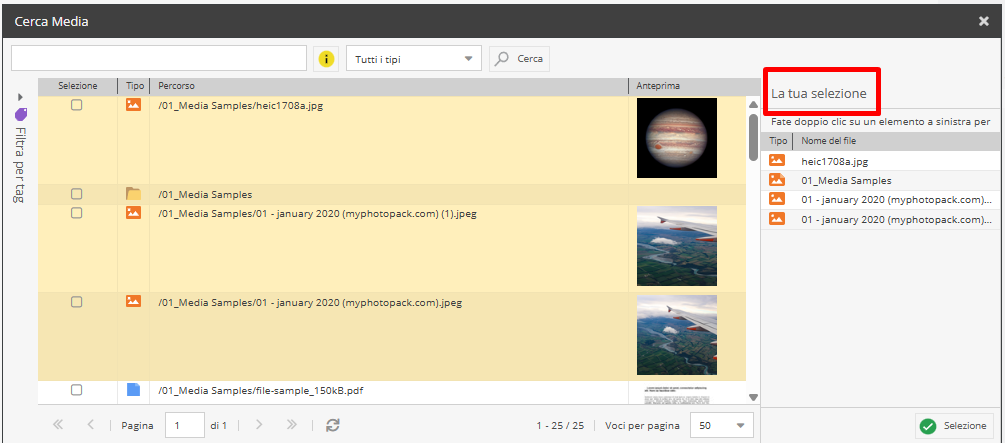
Alternatively, you can make a multiple selection by holding down the Ctrl key (Command on Mac). Once the operation is complete, right-click and click “Add” to bring the entire selection into the dedicated area.
Once the selection is finished, click “Selection”. The selected digital assets will be automatically moved to the destination folder.
“Rename” and “Delete” functions
From the drop-down menu shown, you can also perform routine operations such as changing folder names using the Rename function, and removing items from the system using Delete.
The operation sends the item to the system recycle bin. The manager user account has the ability to restore objects and media from the trash.
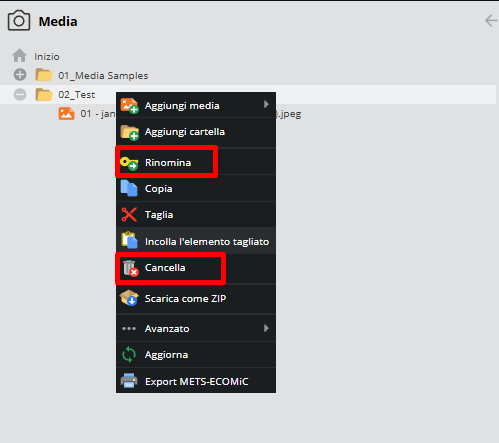
Titles assigned to folders and files can be modified using the Rename function.
Download a folder or file, upload a new version
The system allows you to download a file or folder, thereby exporting the current version locally. To download a folder, place the cursor over it and select Download as ZIP from the menu.
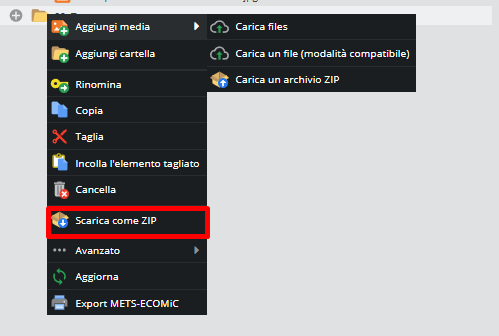
If you position the cursor over a single file, select Download

You can also upload a new version of the same file, keeping the existing metadata and file naming while providing an updated version.

File formats and sizes
Pimcore can manage most digital formats. However, please note that for certain specific formats (such as photographic RAW files), automatic preview generation within the browser may not be supported.
In line with best practices for long-term digital preservation, the adoption of the following formats is recommended:
- Images:
- TIFF: a widely used format for long-term preservation. During upload, the system automatically generates a JPEG preview for quick viewing.
- JPEG and PNG: compressed formats optimized for web viewing.
- Video: .avi or .mp4 formats are recommended
- Audio: .flac or .mp3 formats are recommended
For direct browser uploads, it is recommended not to exceed a file size of 500MB.
If importing larger files or massive data streams is required, FTP upload can be provided, configurable upon specific request from the customer.
Viewing and describing media
Clicking on a media file will open its descriptive card. From the View tab, you can view the preview and download the media file in different formats.
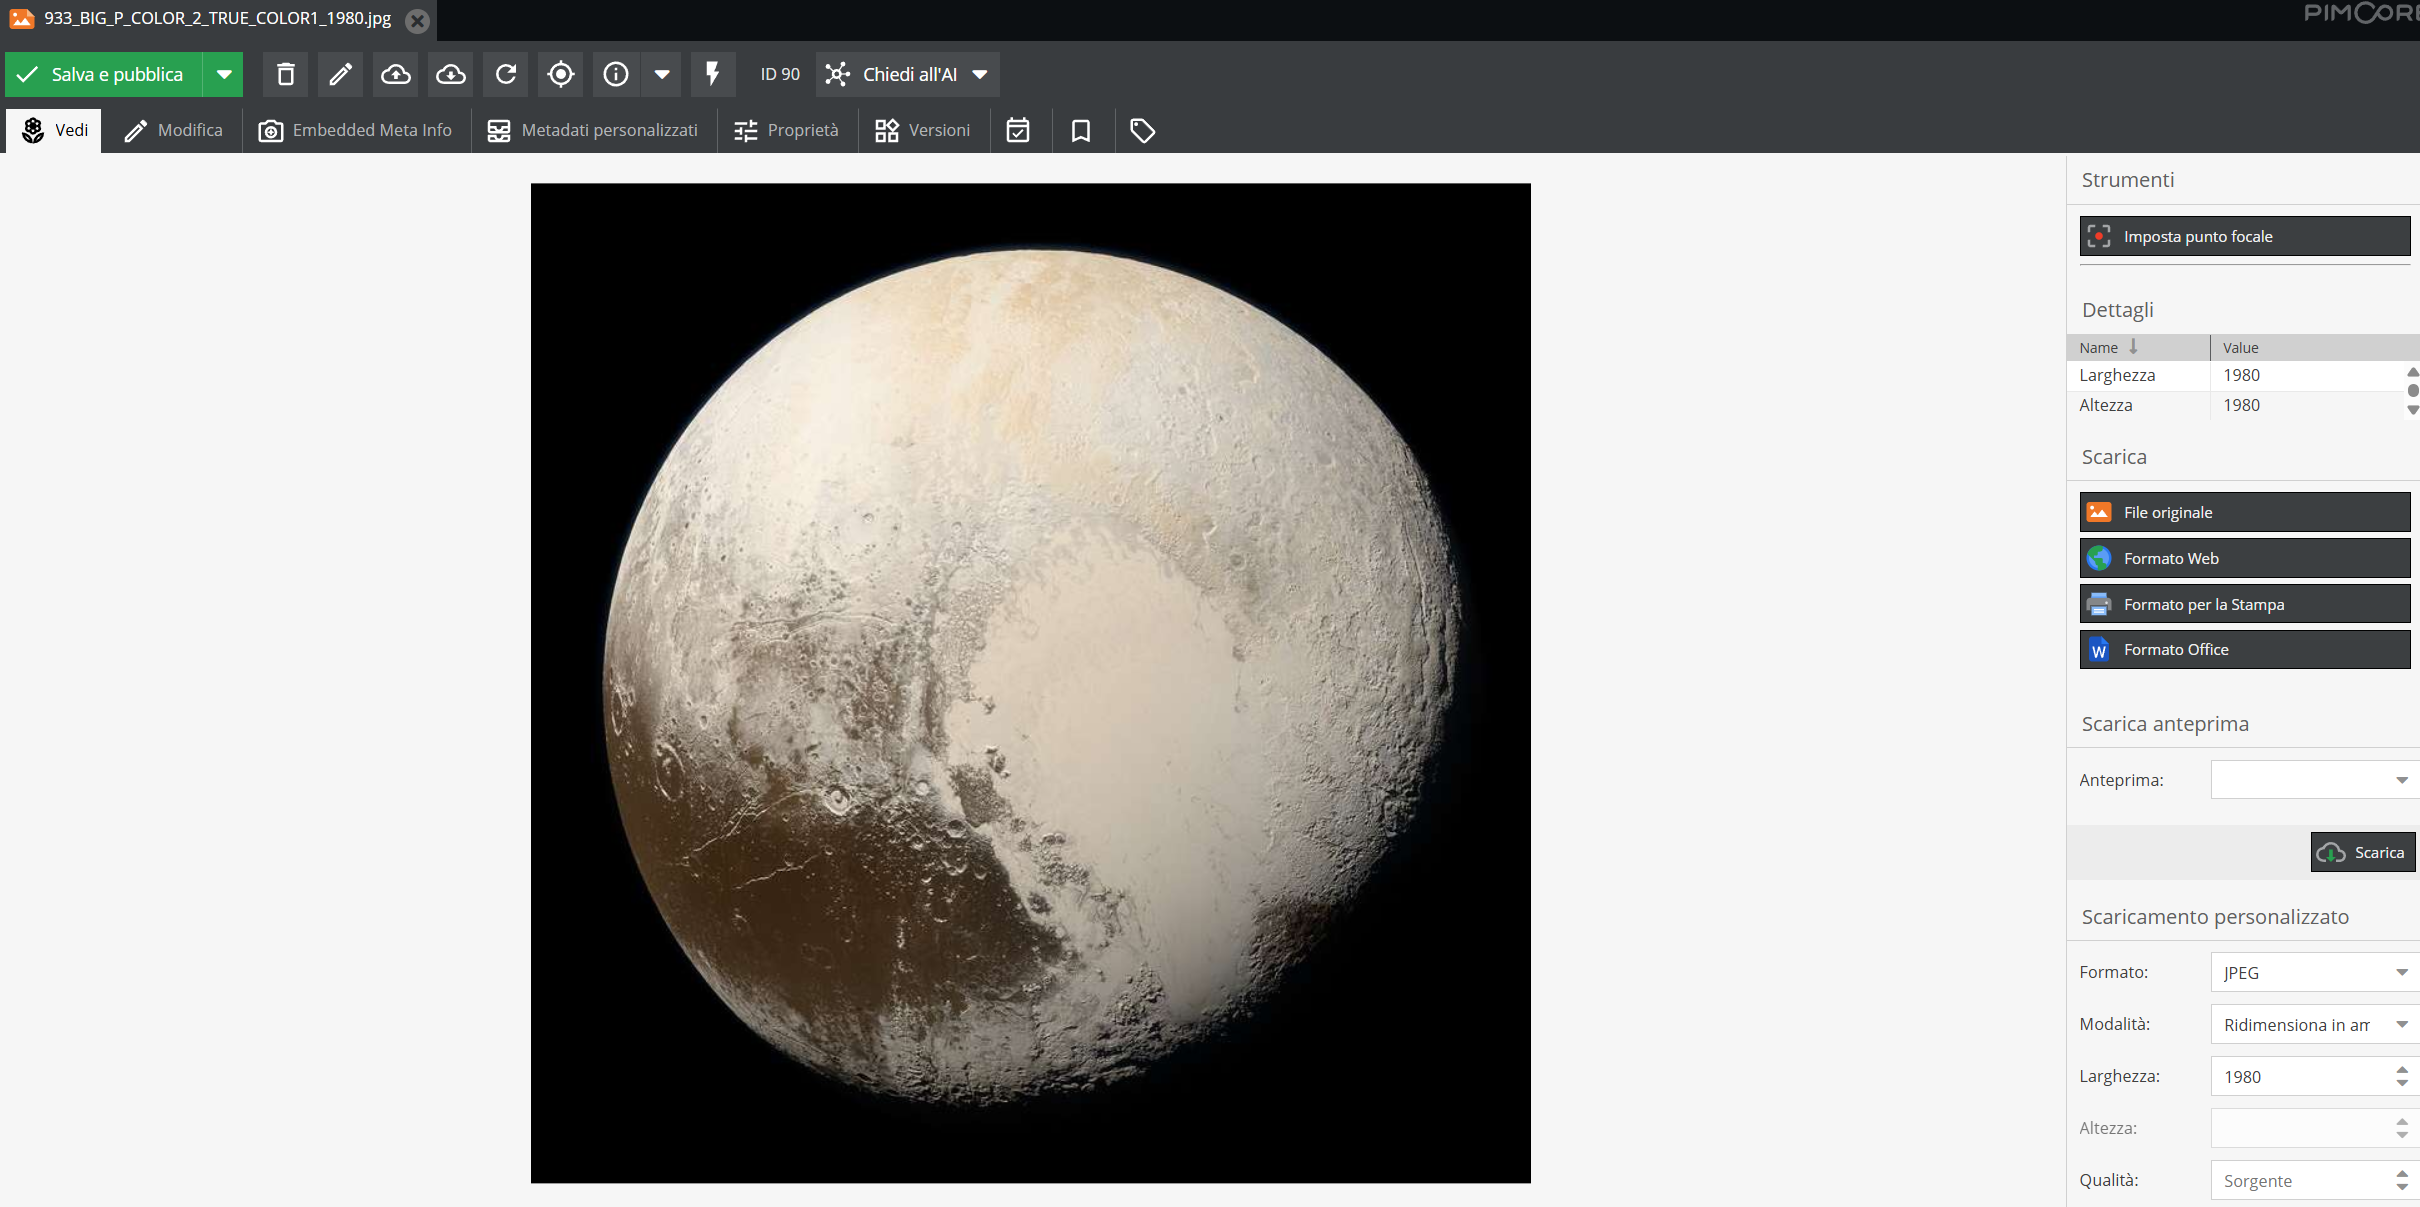
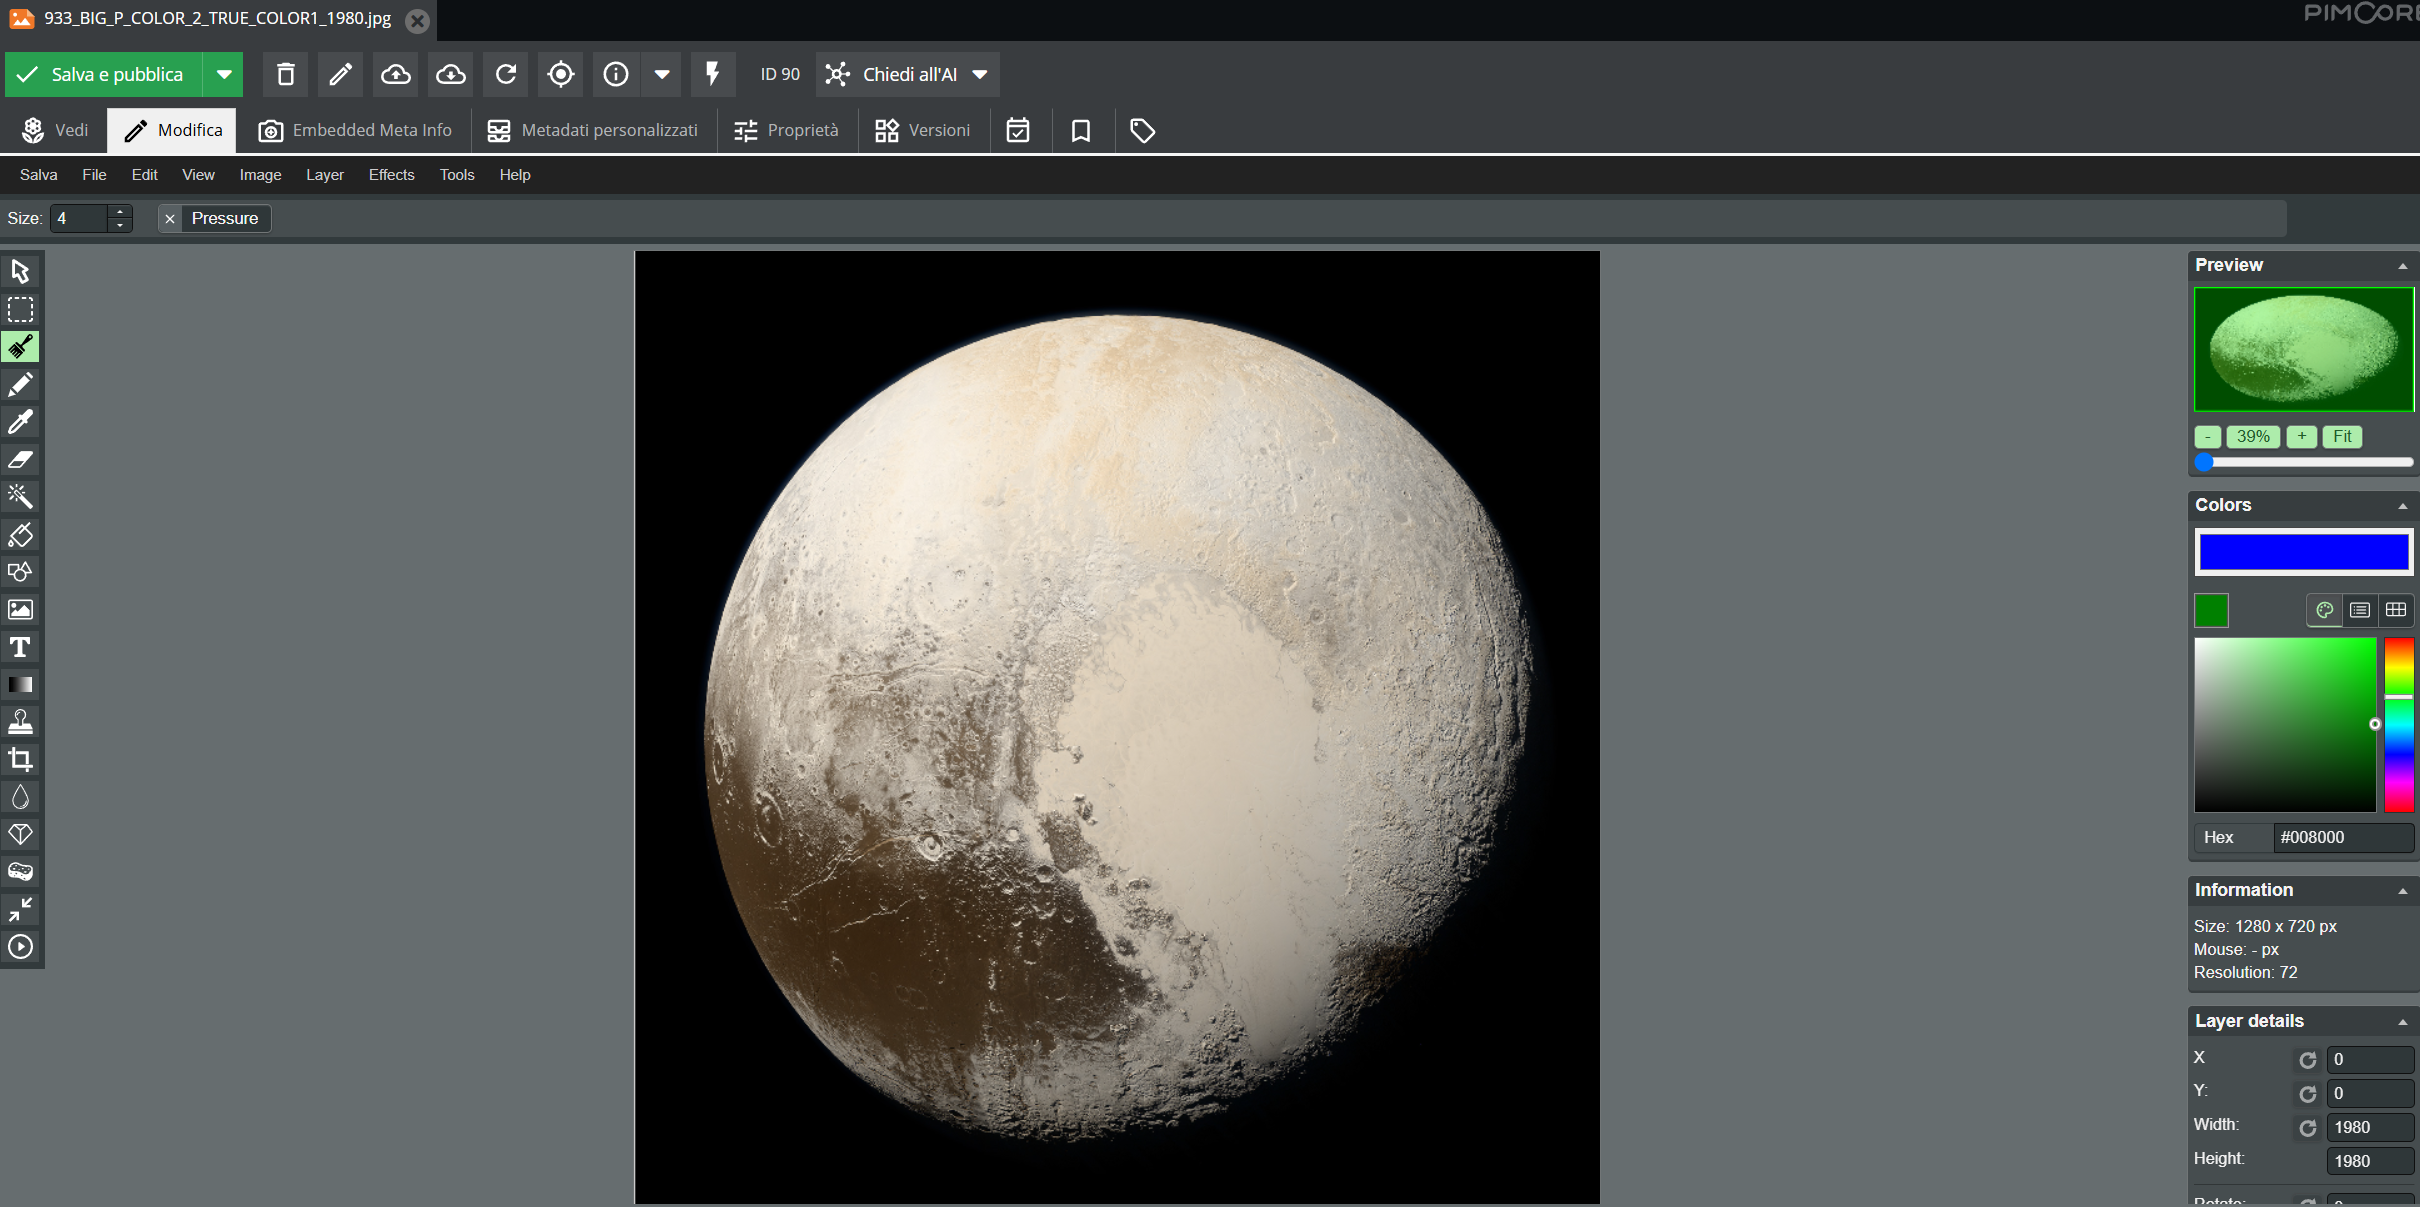
The Edit tab opens a file editor that allows you to make minor adjustments, color corrections, and resize the file.
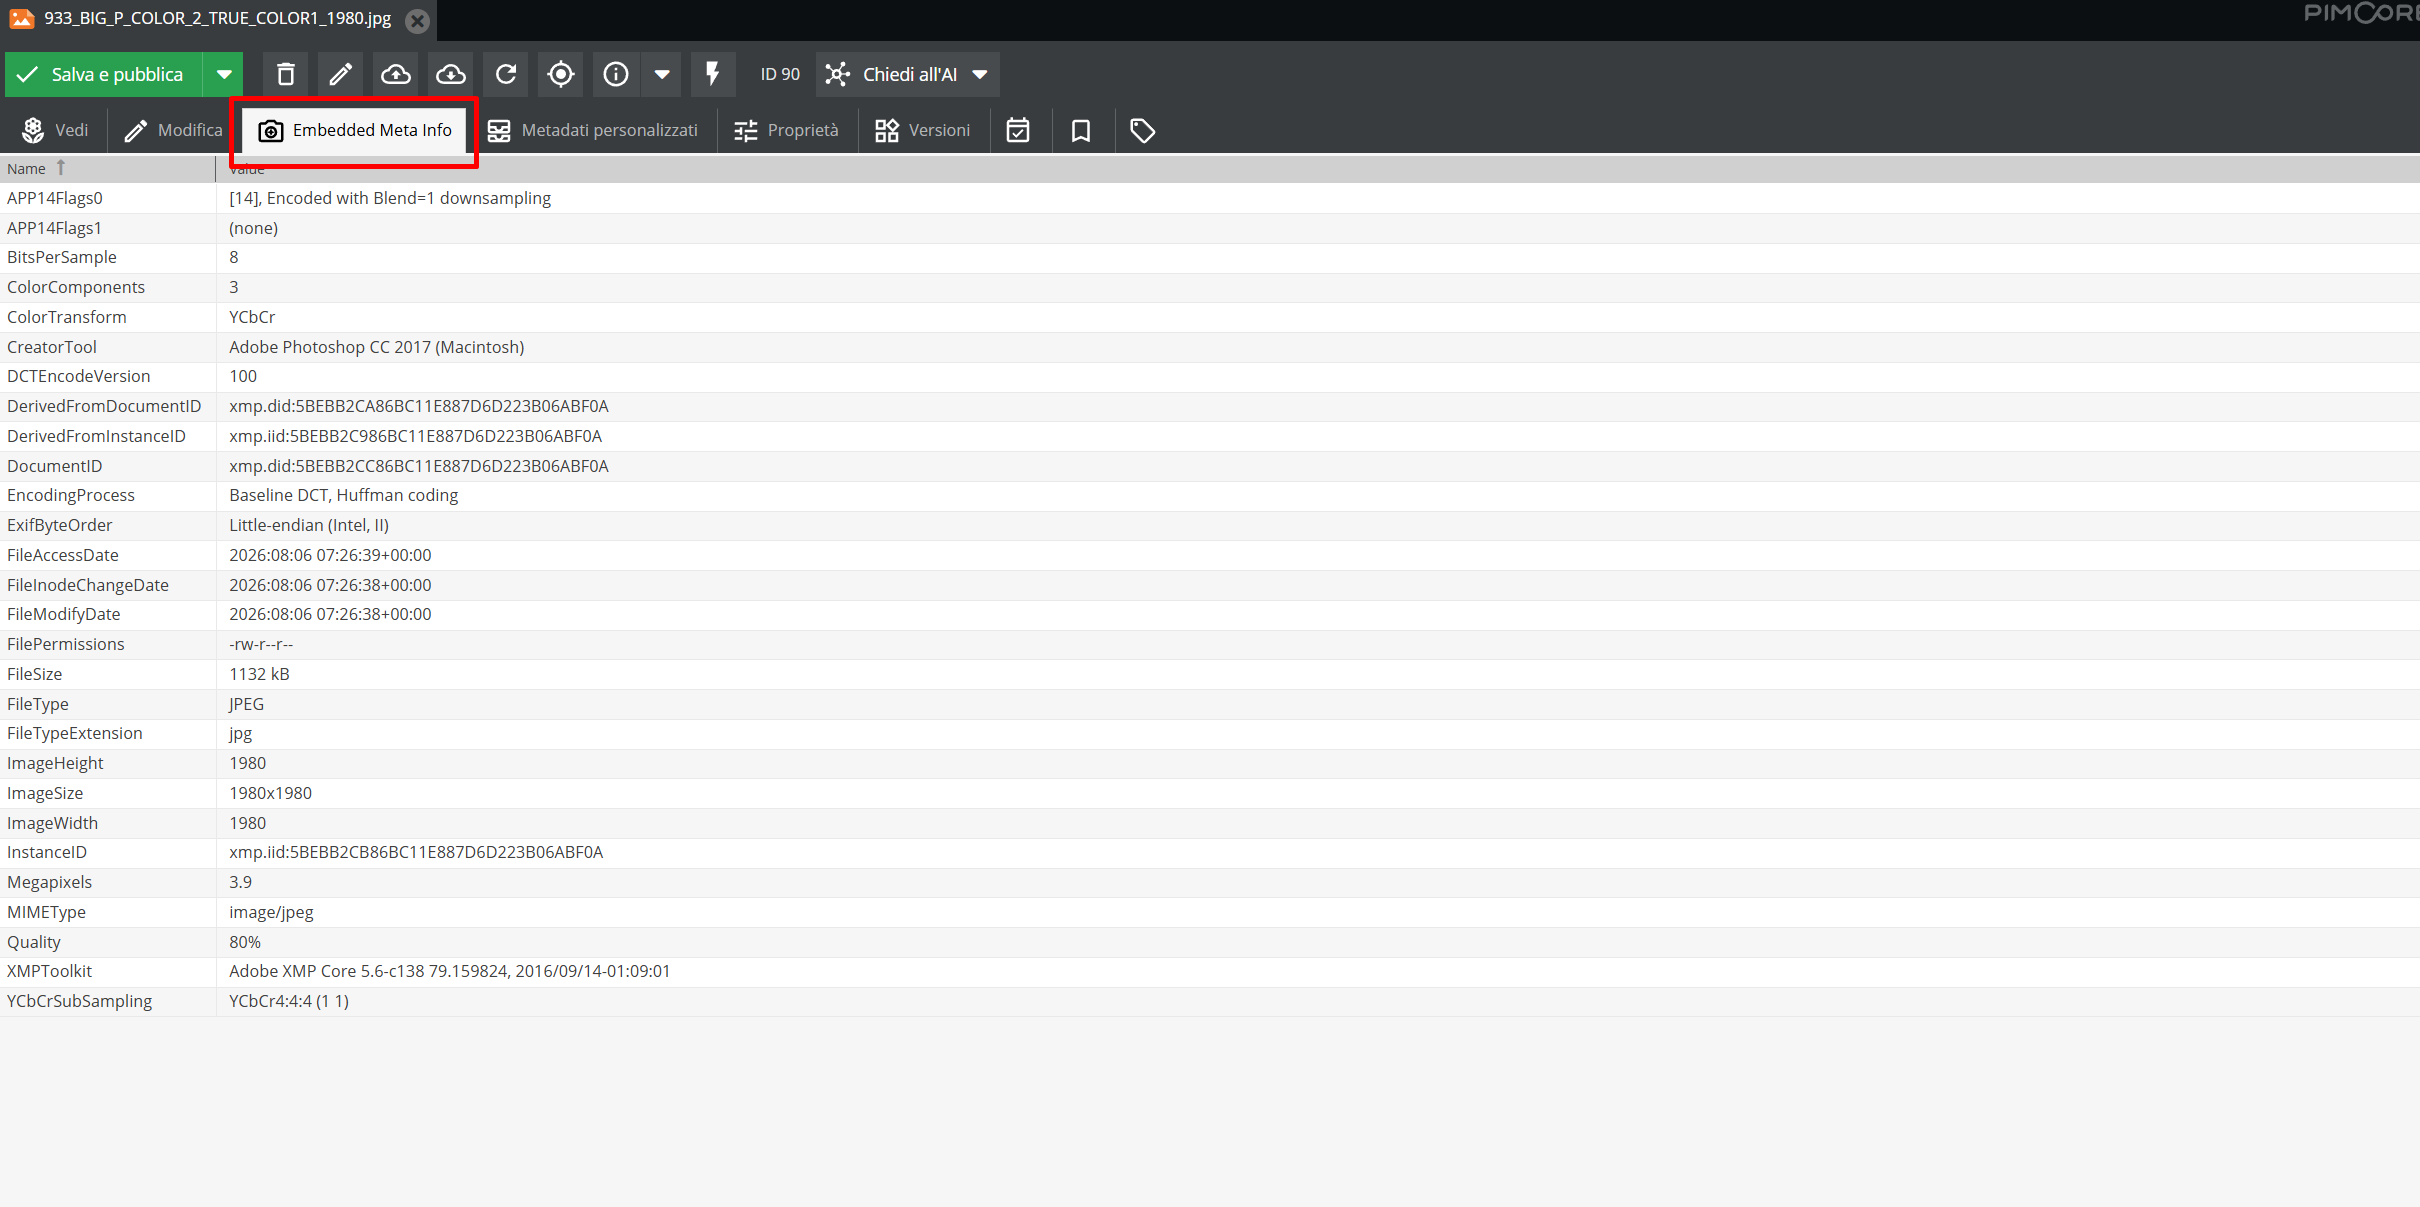
The Embedded Meta Info tab opens a list of all metadata embedded within the file: this data is automatically applied at the time of shooting or scanning by the devices performing the digital acquisition of the image.
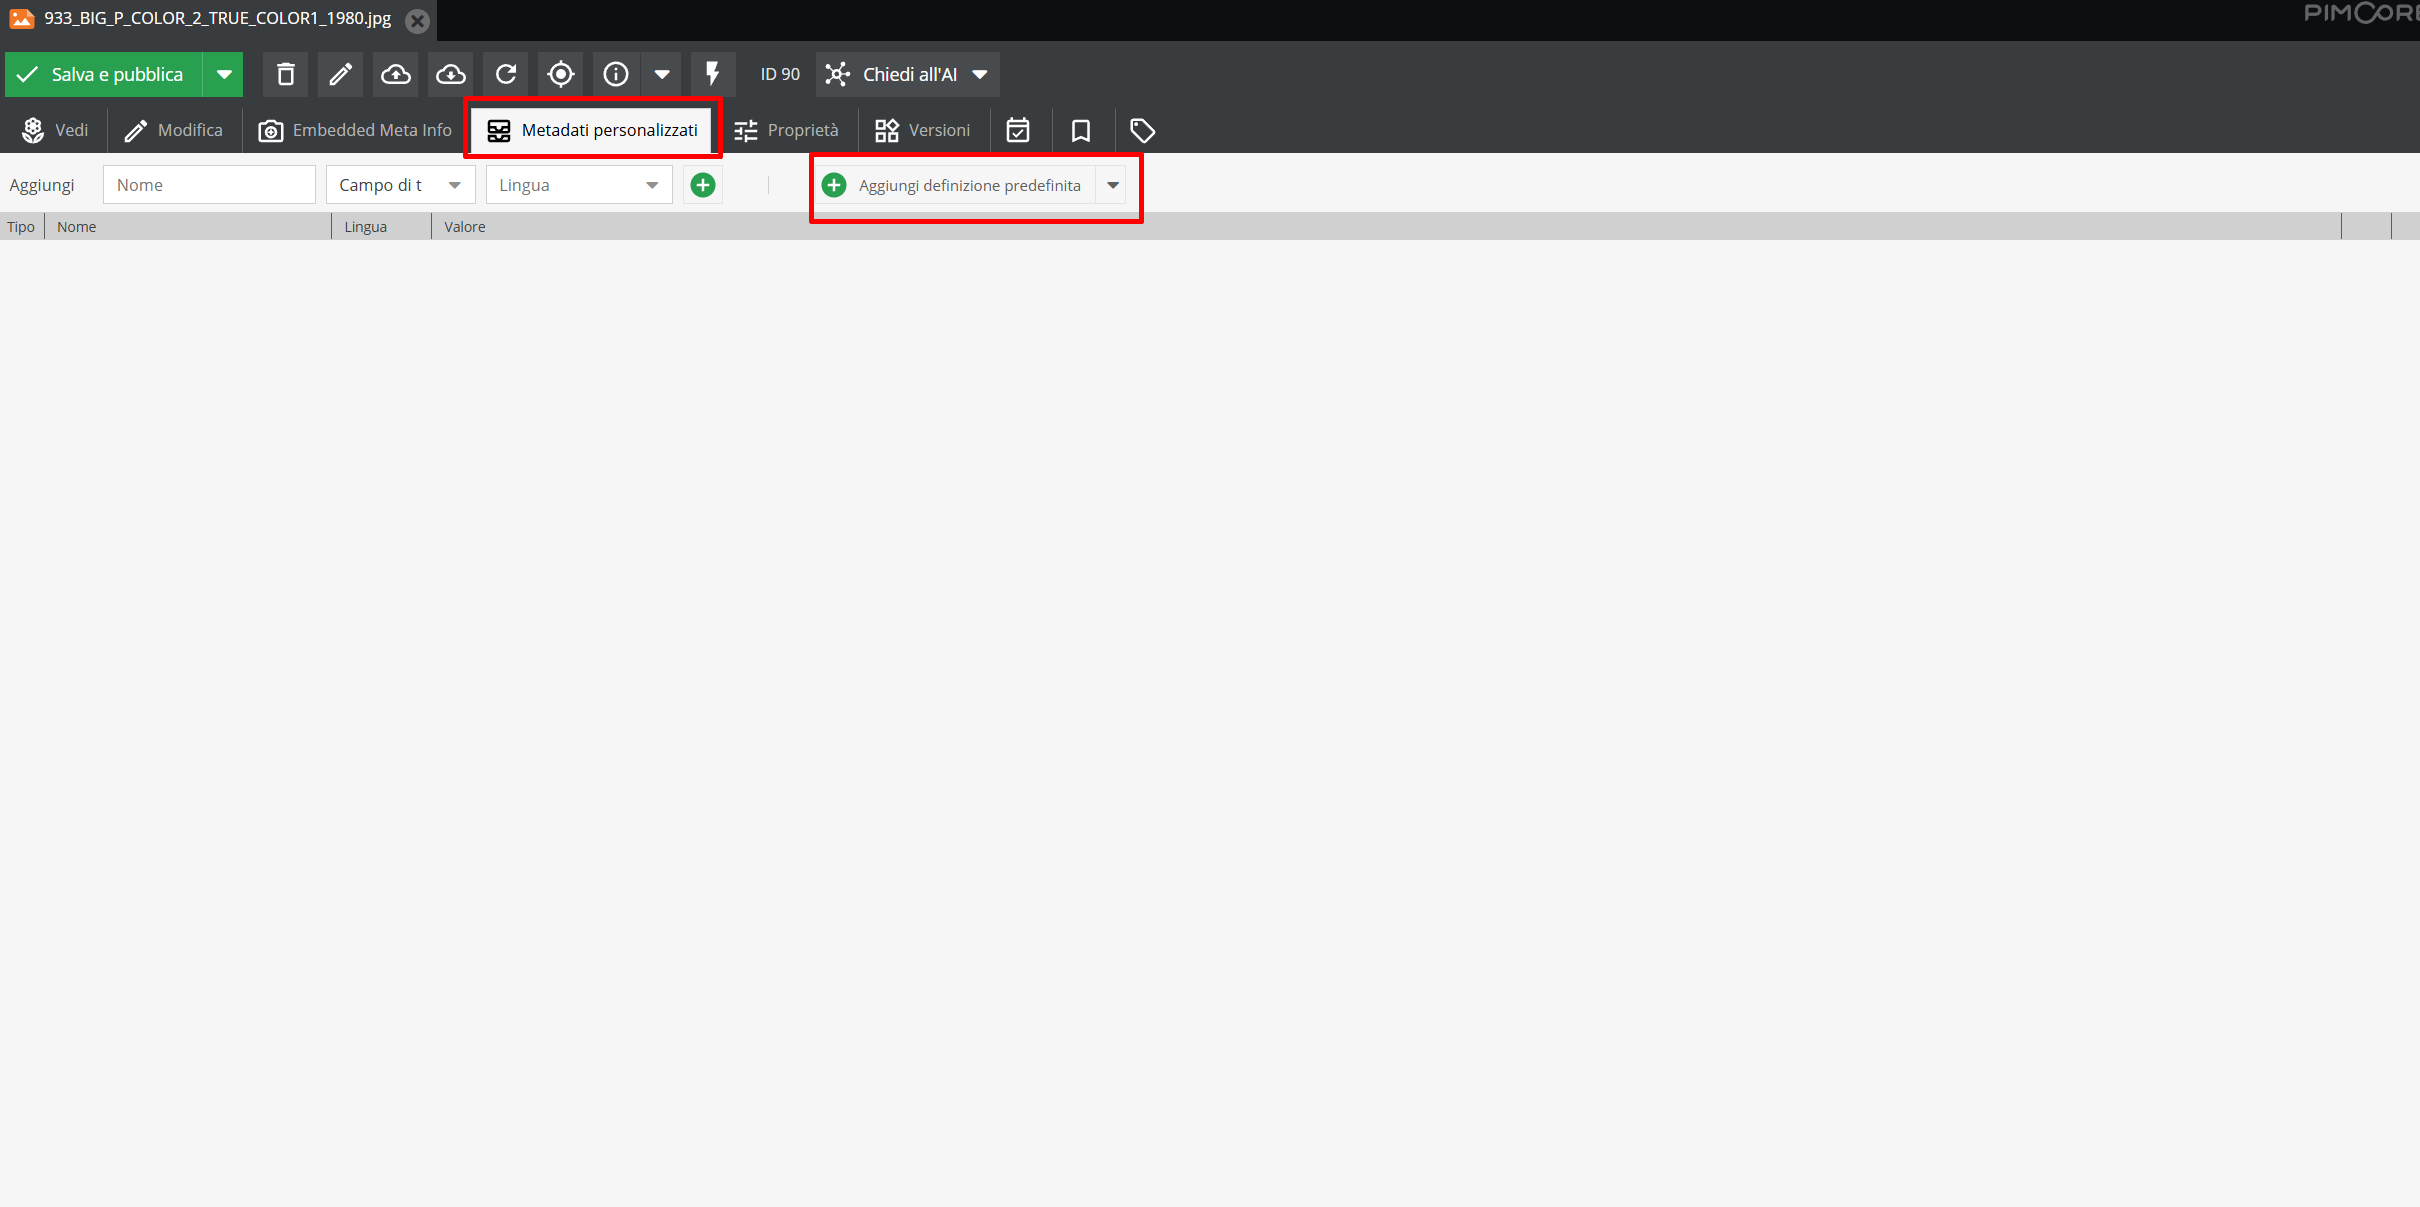
The Custom Metadata tab allows you to enter actual descriptive fields for the media file, which can be filled in by the user.
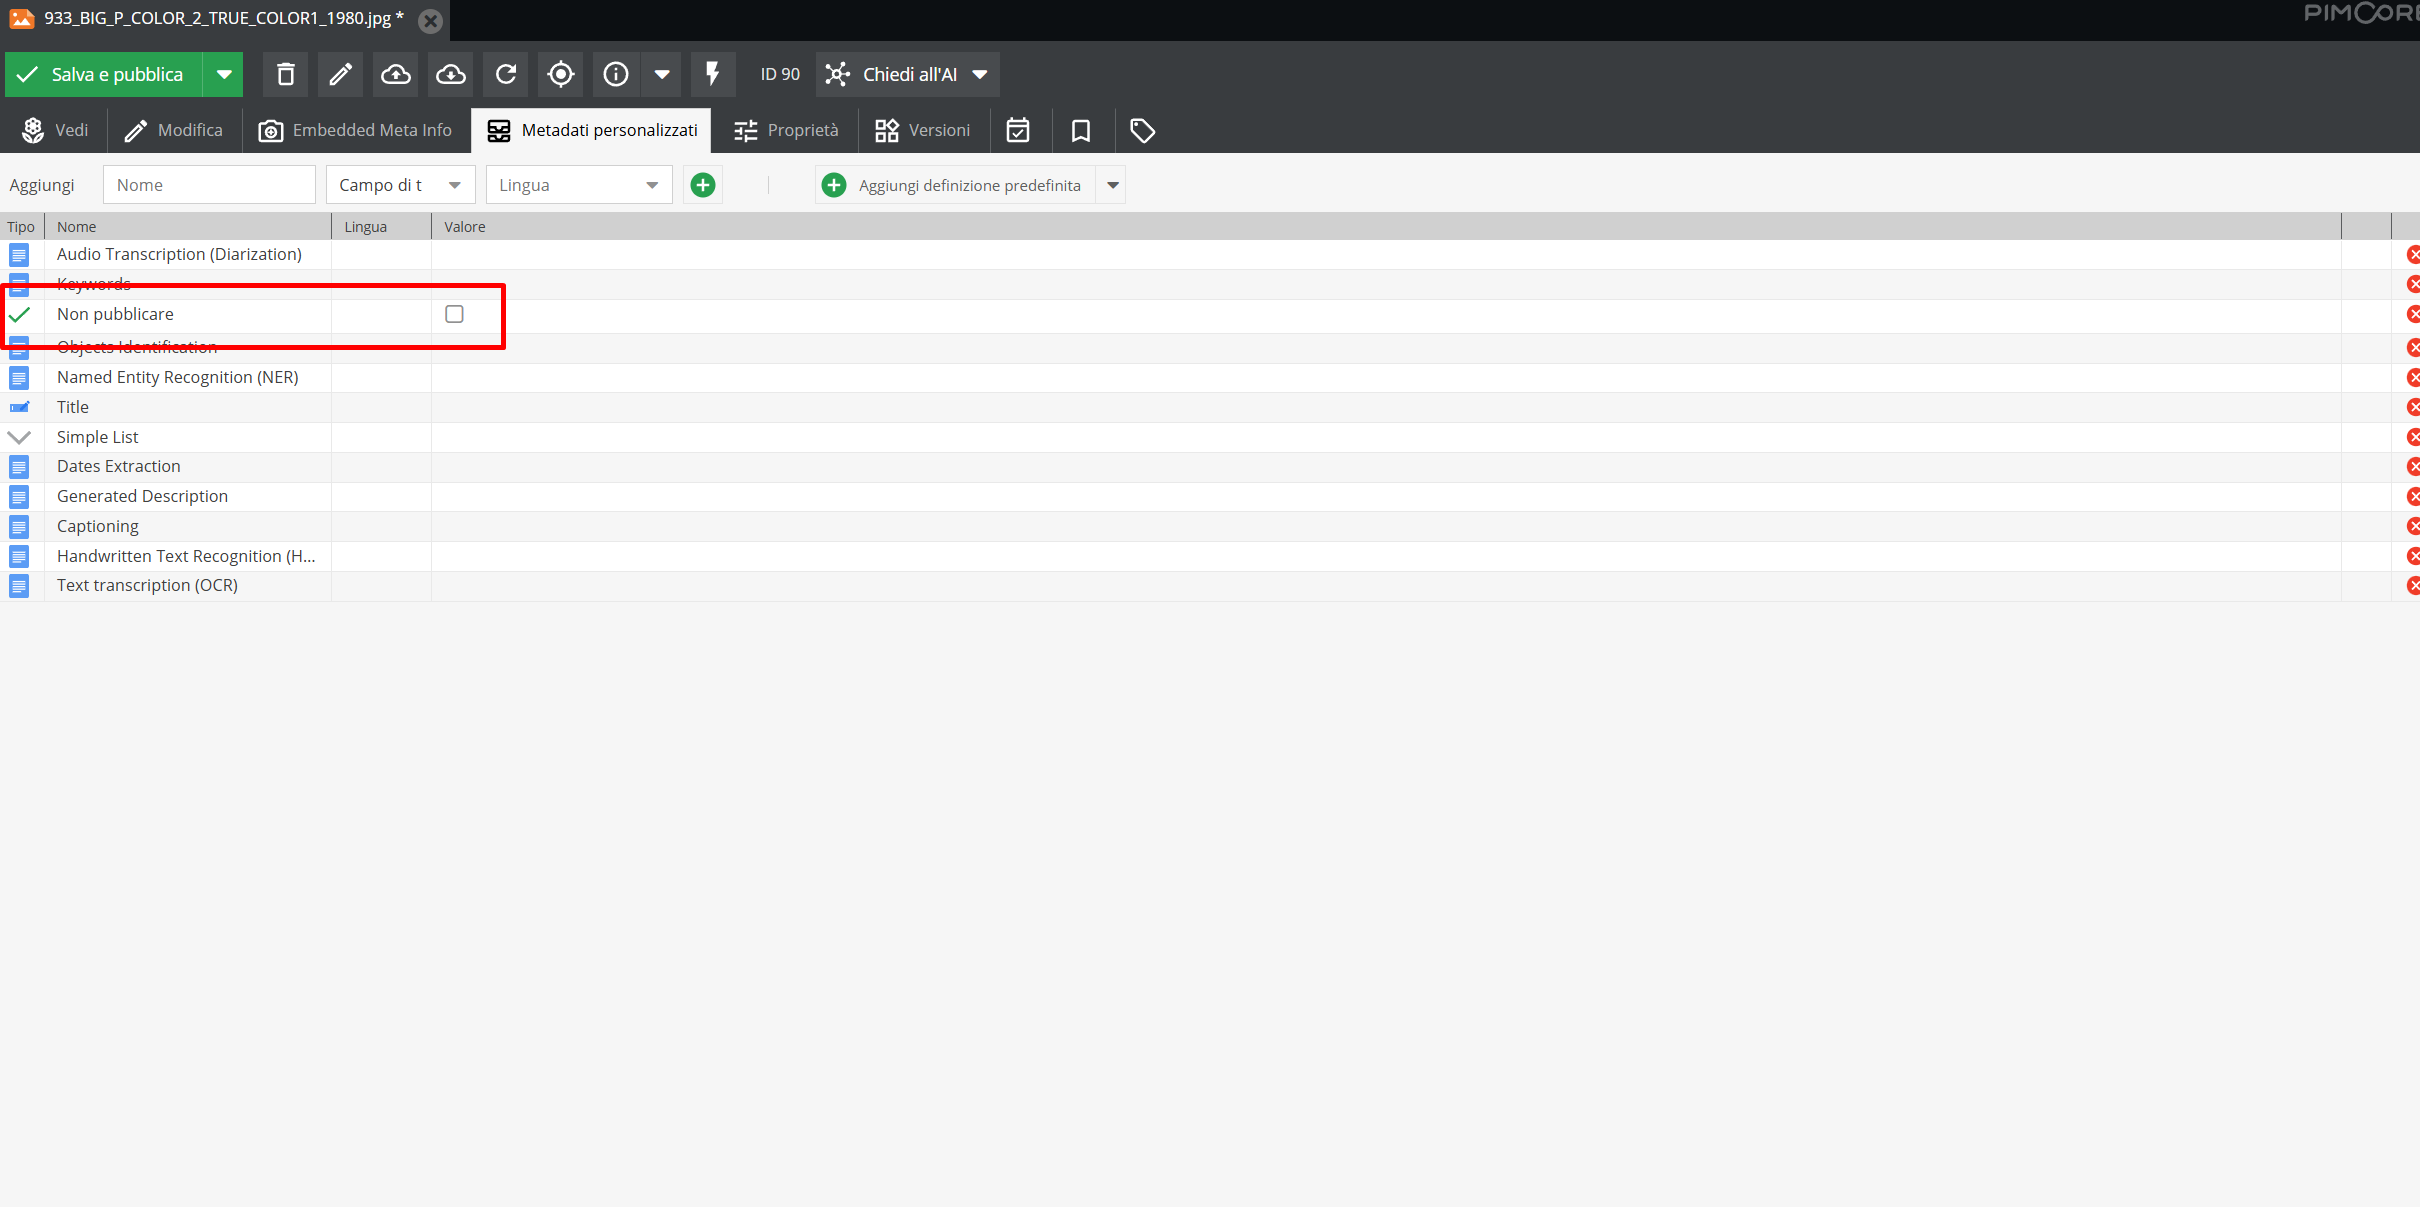
Upon customer request, additional fields can be integrated, which will appear when clicking the Add predefined definition button.
Among the enabled options, note:
- Do not publish, an option that allows you to make the media completely unviewable from the Console for all user roles.
For the proper management of other metadata, see the paragraph “Ask AI” feature
The Versions tab allows you to view all changes made to that specific media file, showing the user and timestamp.
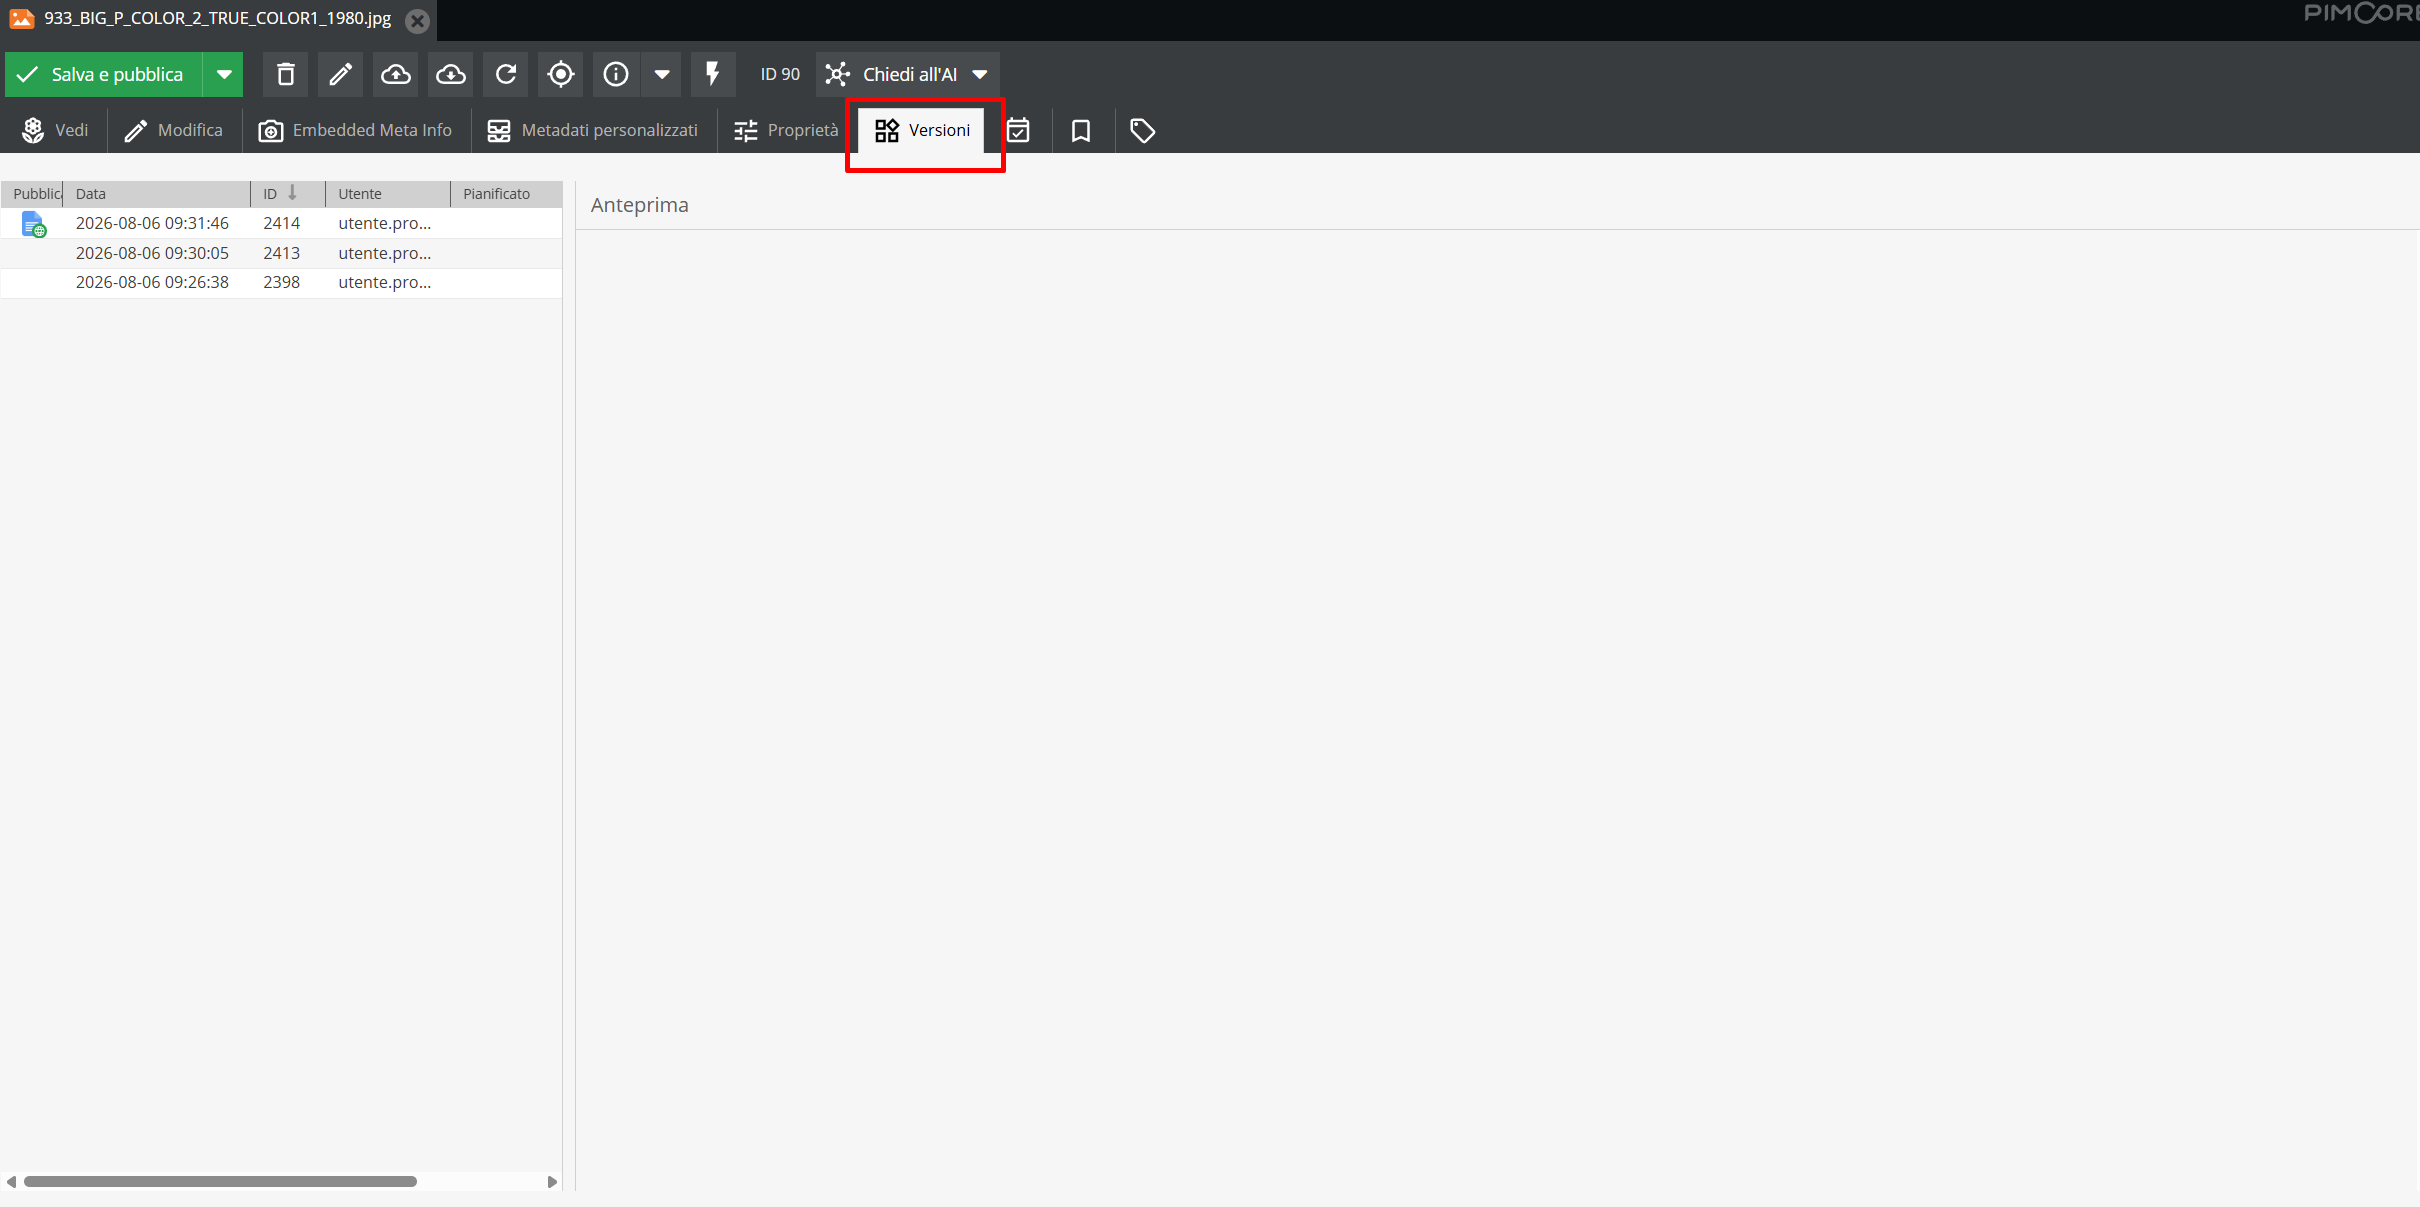
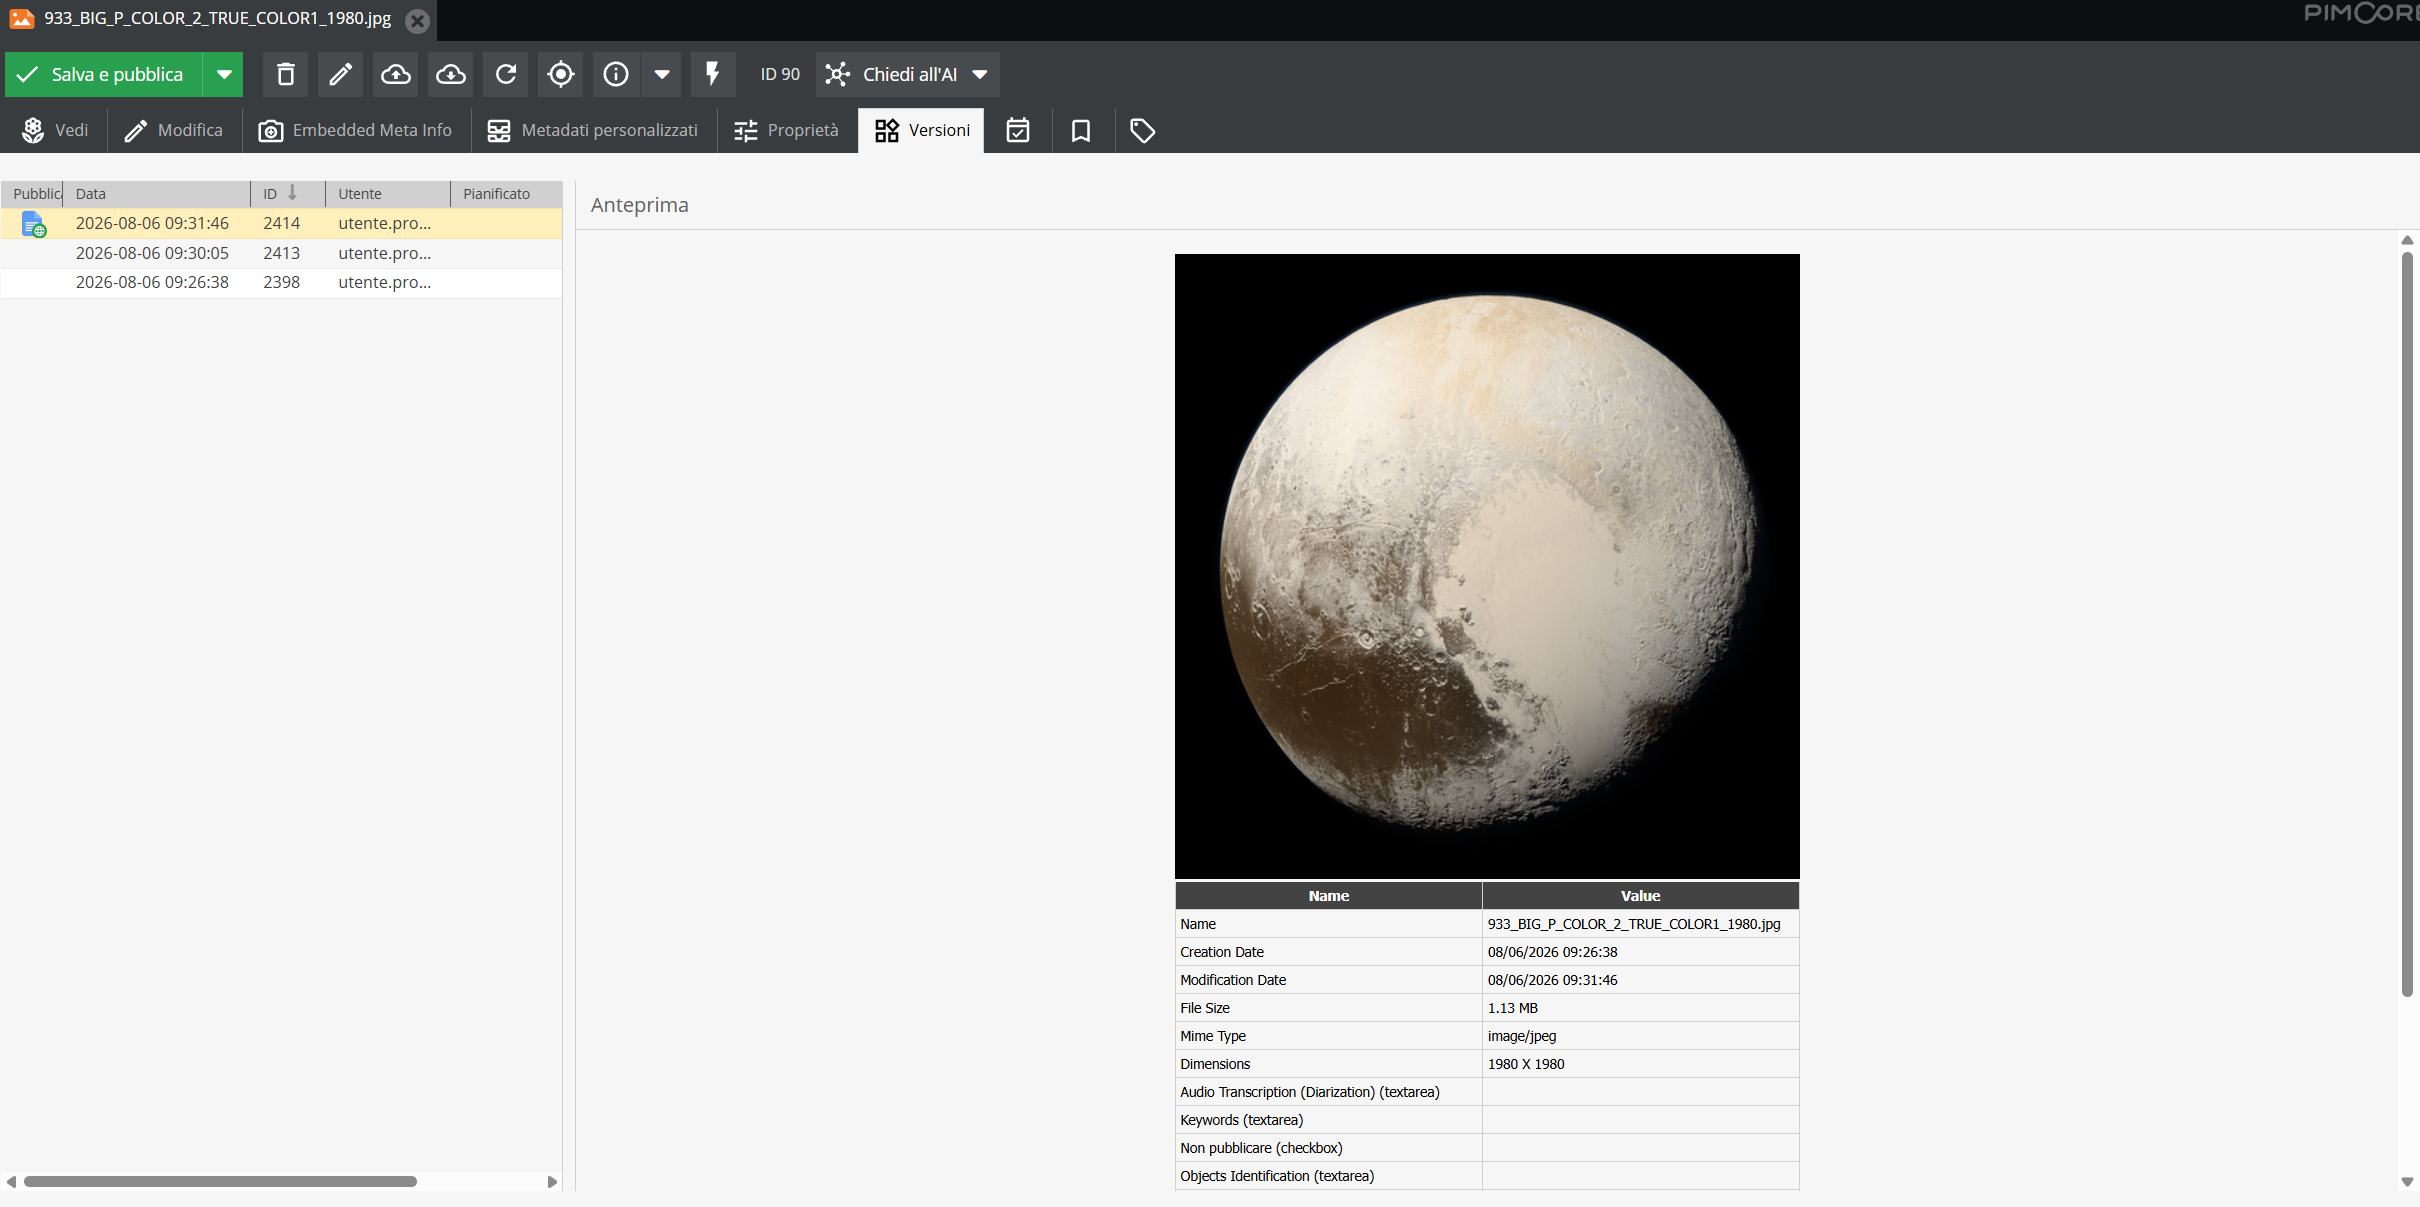
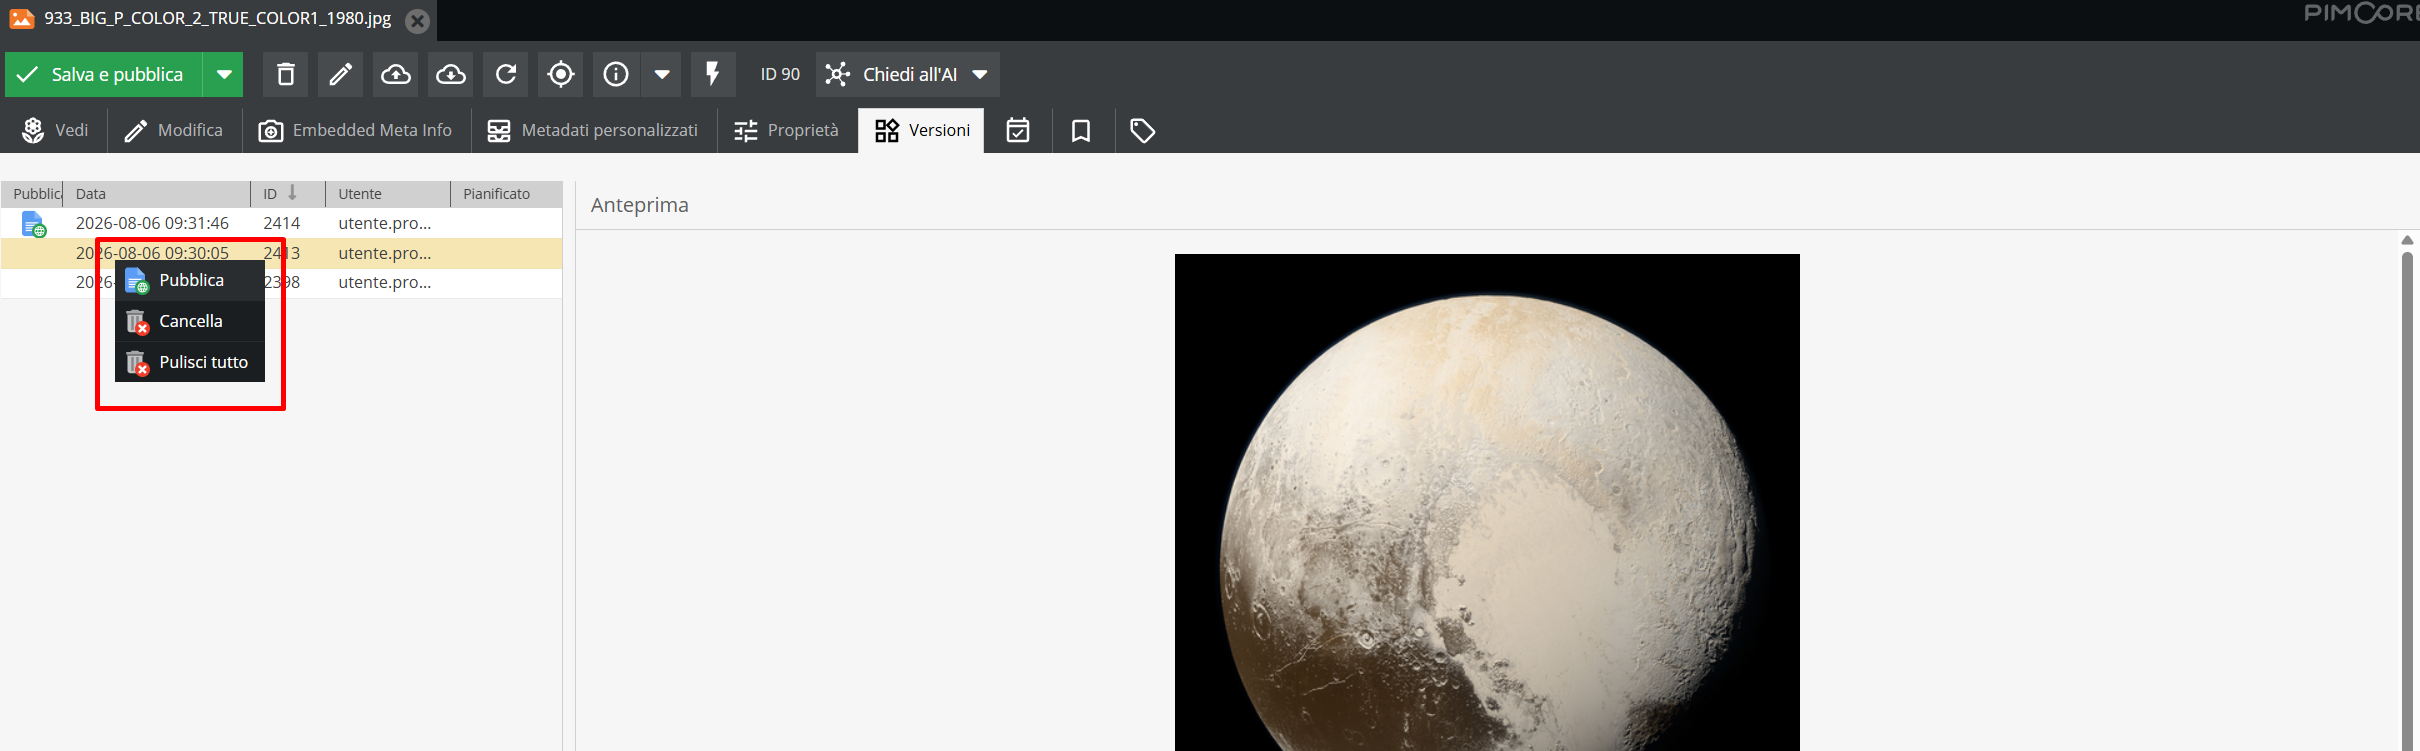
By right-clicking on a version, you can:
- Revert to a previous version by clicking Publish
- Delete one of the versions or completely clear the history.
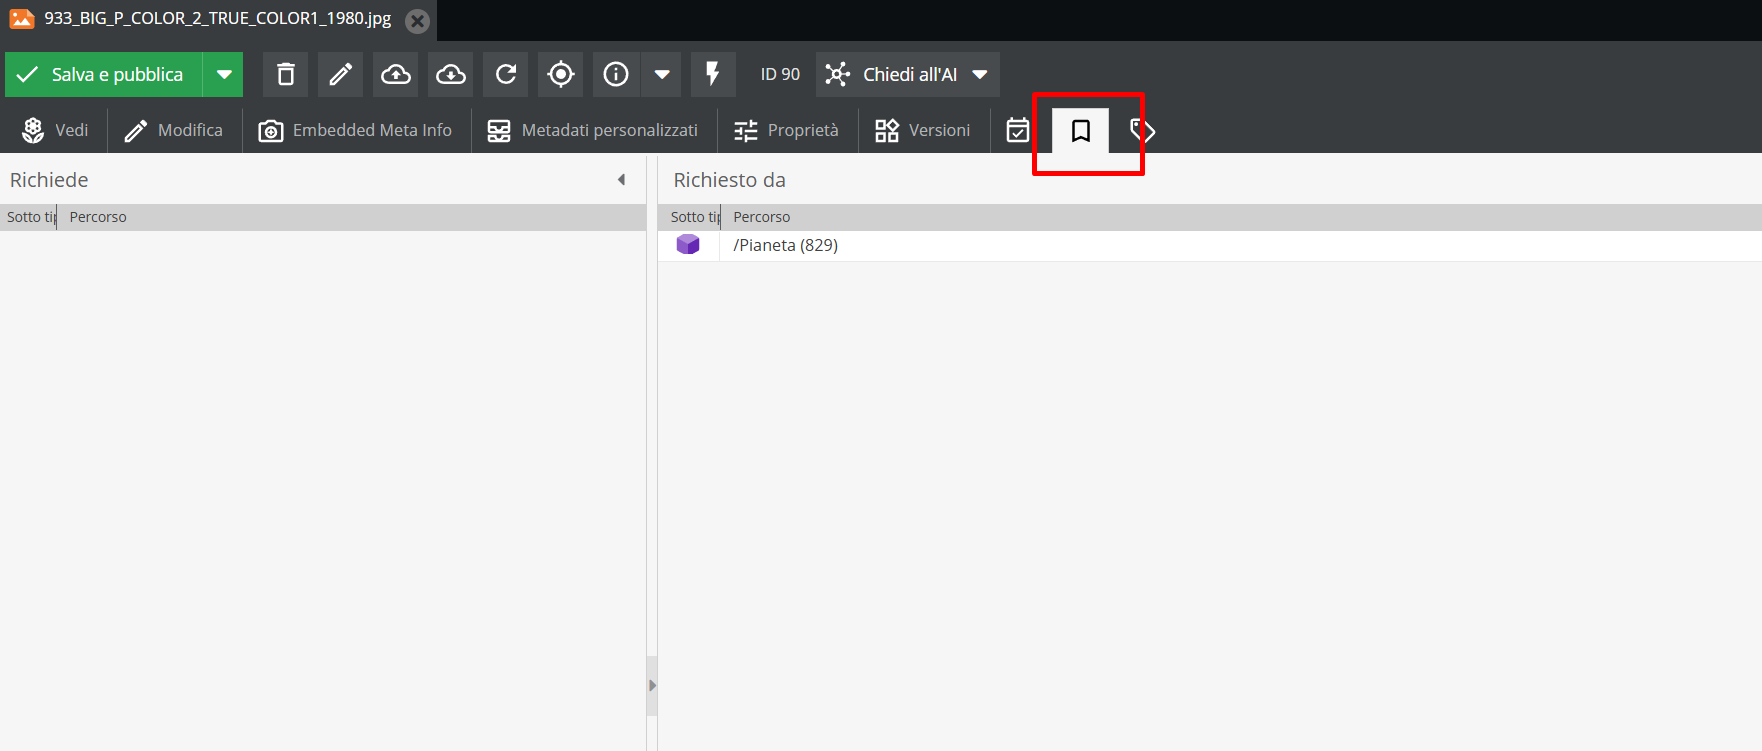
The Dependencies tab records all dependencies of the media file in question, indicating any relationships with Objects records.
The Tags tab is dedicated to media tagging: from here, you can select one or more tags and assign them to the record in question.
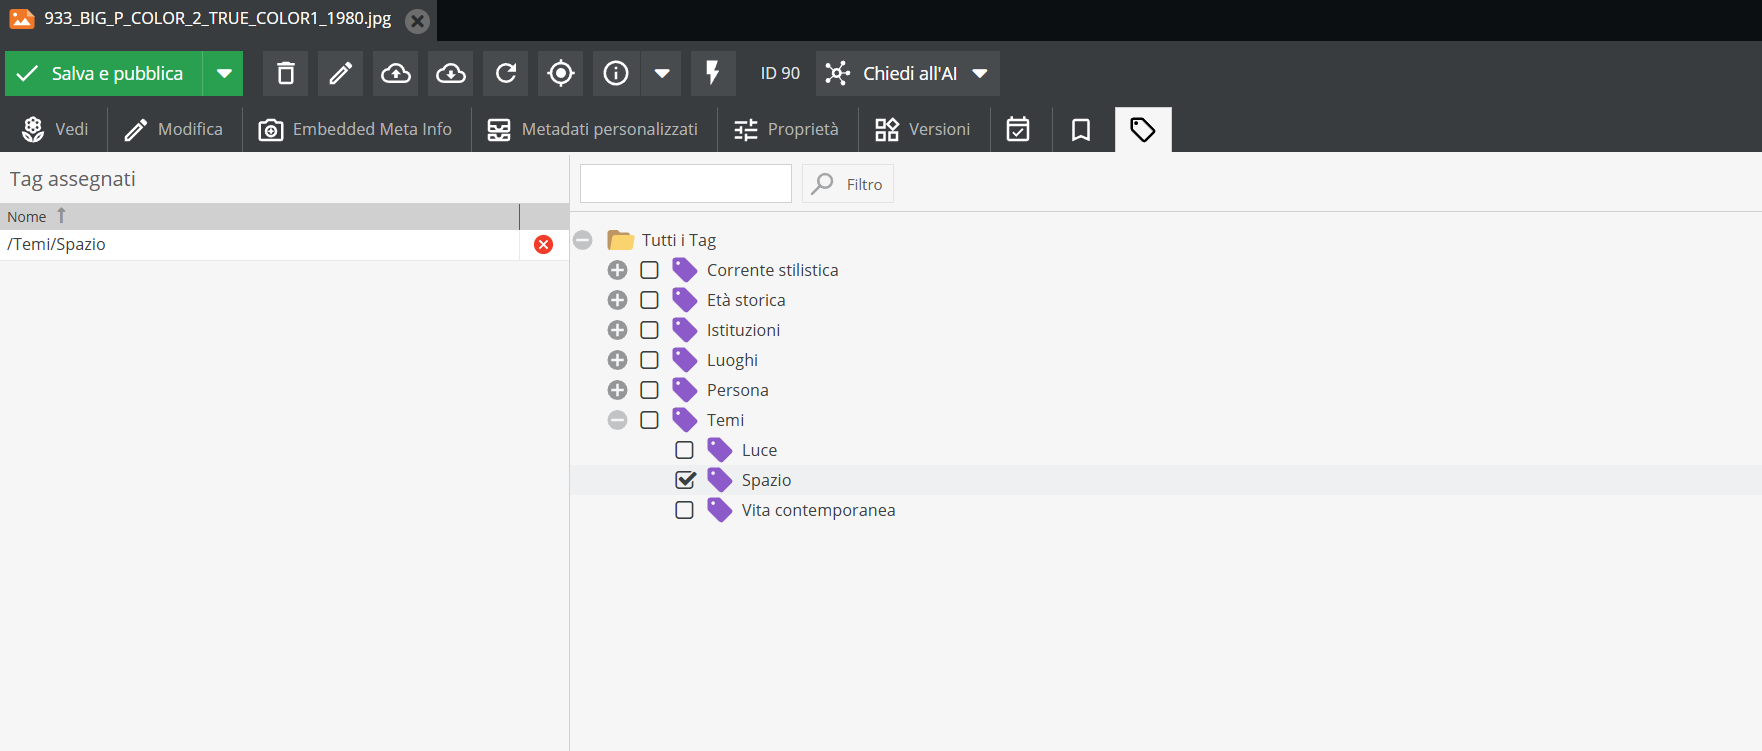
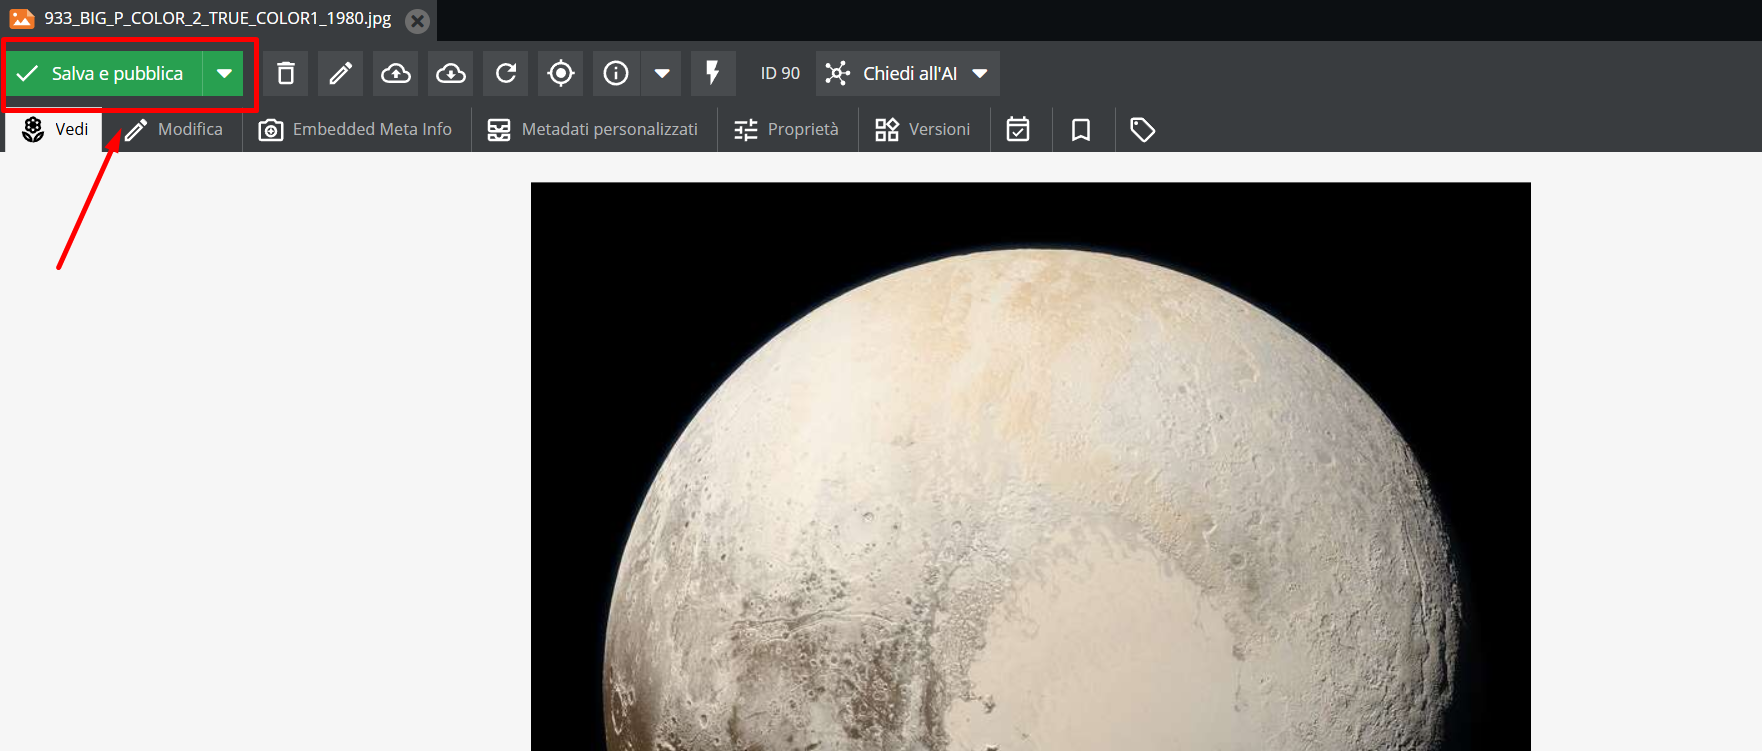
All changes made to the record will then be saved by clicking the green Save & publish button.
"Ask AI" feature
Introduction and available functions
The system allows you to automatically populate Custom Metadata fields using the “Ask AI” feature, which introduces automated media description tools based on Machine Learning and Computer Vision for automatic information extraction from digitized assets. The operating principle is simple: media files are submitted to an external artificial intelligence engine (currently Google Gemini) — the use of which involves token consumption calculated based on the requested service — which returns a content processing output; the obtained data is then structured and made available as custom metadata, ready to be verified, integrated, or corrected by the cataloger.
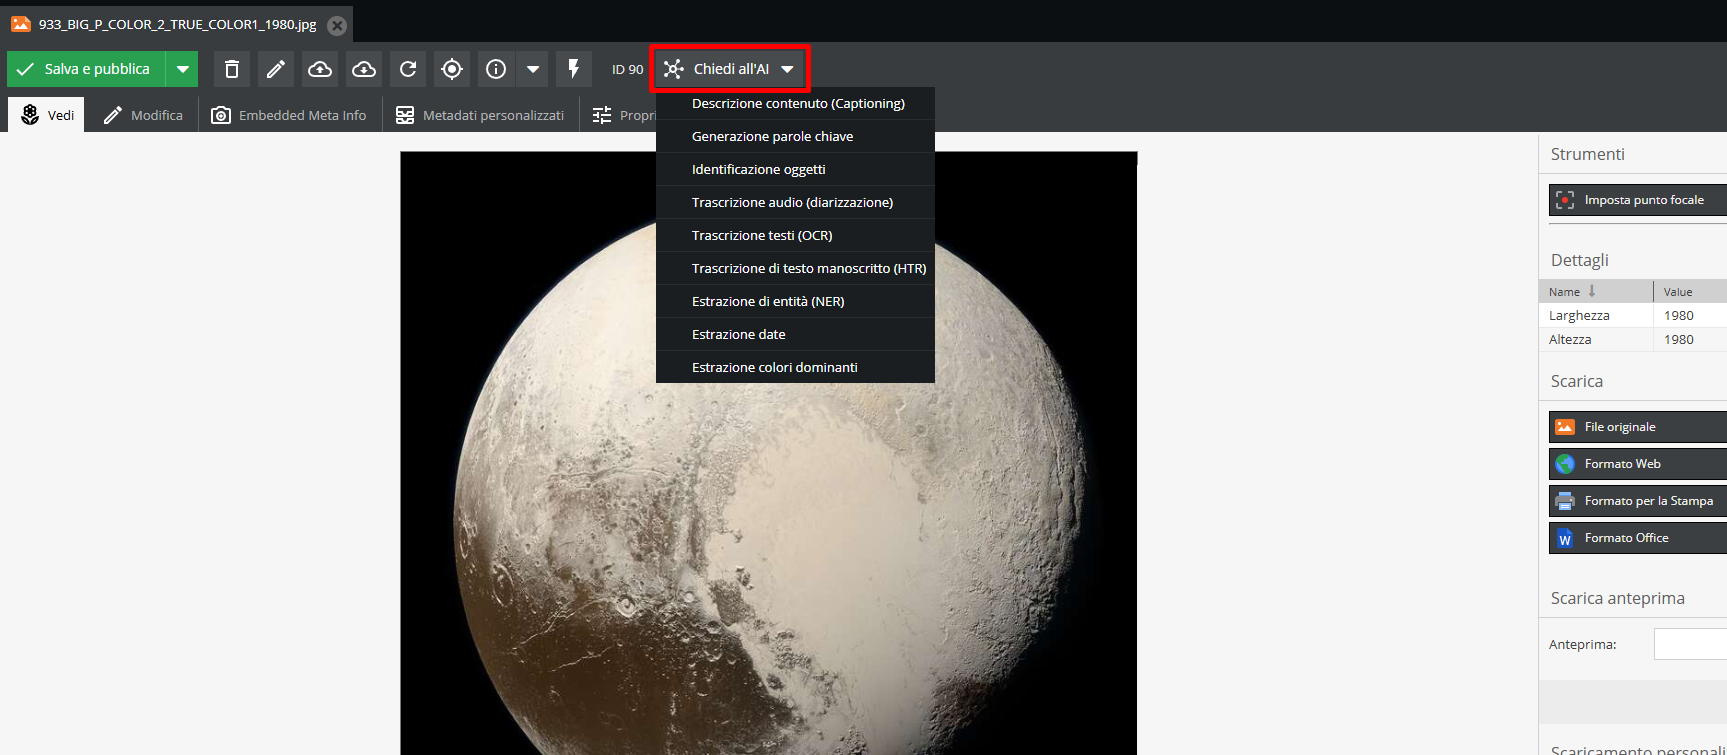
Clicking on the selector opens a drop-down menu with the available functions, briefly described below:
Content description (Captioning)
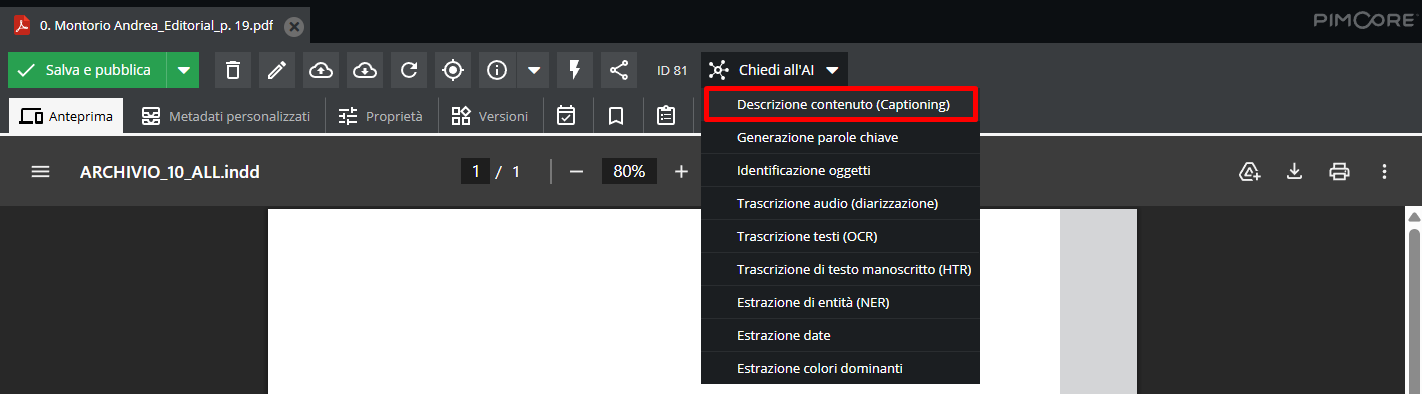
Automatically generates a textual description summarizing the visual content of an image or video frame, facilitating the population of descriptive fields with immediate context on the document.
Keyword generation
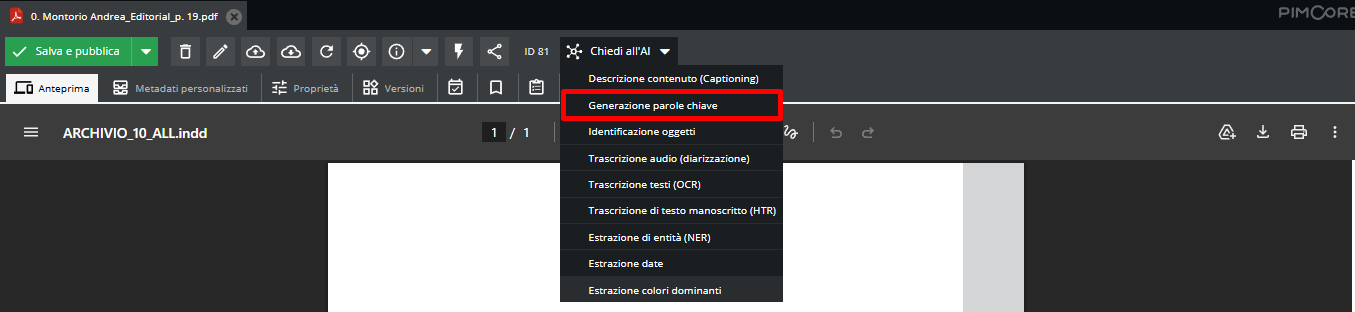
Proposes an initial content classification by generating a list of keywords (separated by a delimiter character) that identify the main concepts, subjects, or themes present in the document or digital object; optimizes indexing and enables cross-cutting search paths based on concepts not necessarily present in the file title.
Object identification
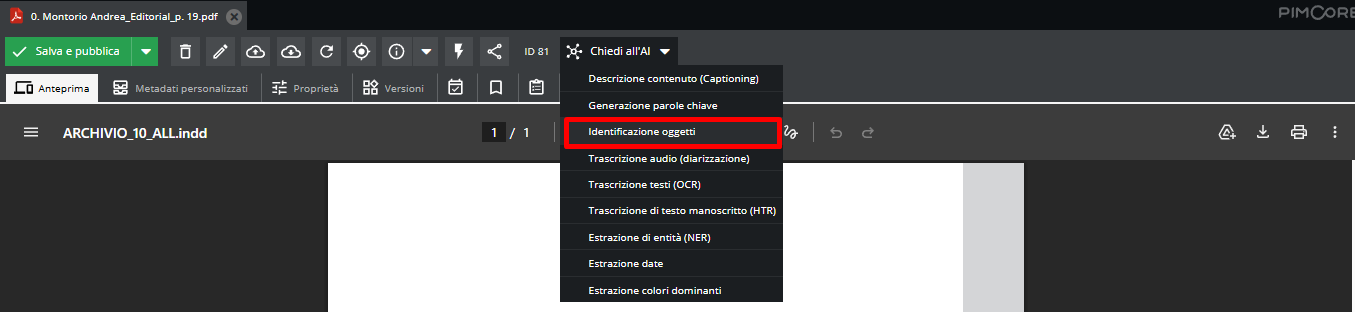
Recognizes physical elements depicted in an image, particularly useful for scenes containing multiple distinct objects (for example, furniture elements in an environment photograph); supports targeted iconographic searches, such as identifying all photographs depicting a specific type of object.
Audio transcription (diarization)
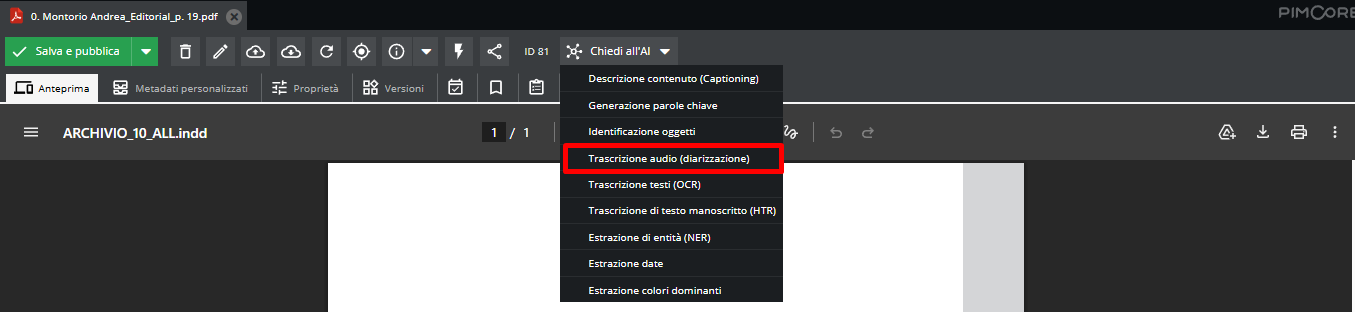
Converts speech to text (speech-to-text) and adds diarization, i.e., the ability to distinguish and separate different speakers within the audio file; useful for transcribing interviews, assembly recordings, or oral sources, where diarization allows statements to be correctly attributed to their respective speakers.
Text transcription (OCR — Optical Character Recognition)
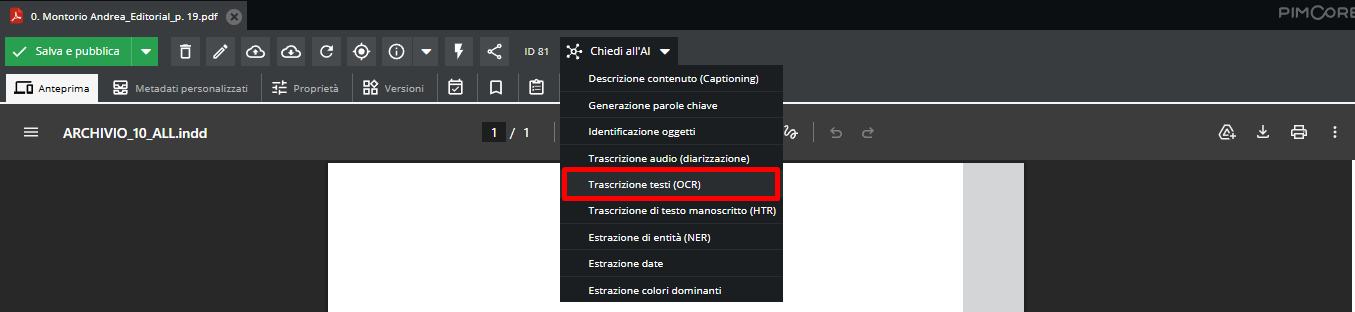
Applies optical character recognition to printed or typewritten documents, generating a literal transcription of the text viewable as media metadata; speeds up the transcription of printed text, reducing manual typing work.
Handwritten text transcription (HTR — Handwritten Text Recognition)
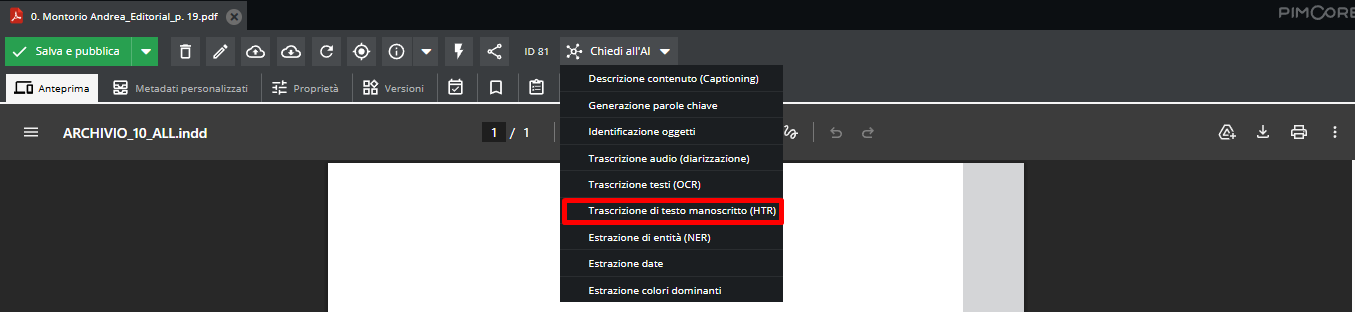
An evolution of OCR specialized in recognizing handwritten text, based on neural models that analyze the stroke (ductus) and linguistic context; it is a useful tool for transcribing historical registers, correspondence, and diaries, significantly reducing working times compared to fully manual transcription. The function is not suitable for paleographic transcriptions of medieval texts.
Entity extraction (NER — Named Entity Recognition)
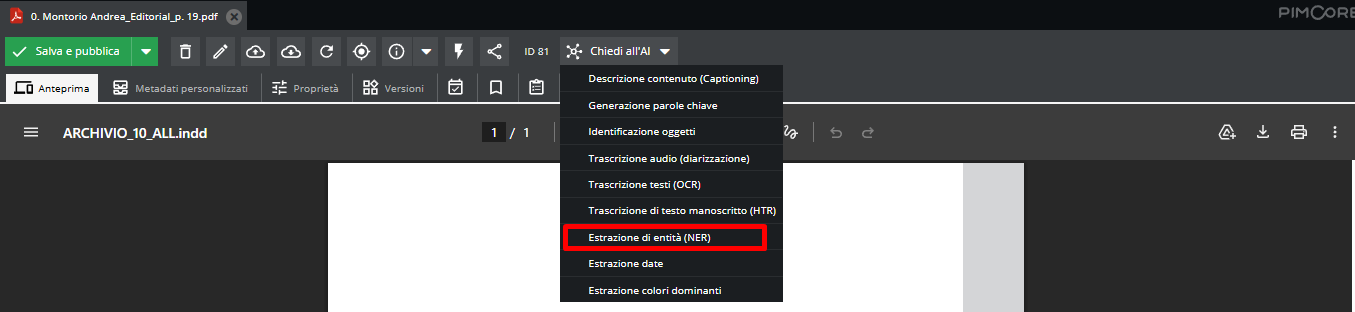
Identifies and categorizes "named entities" present in a text — people, organizations, geographical locations — returning them in a list separated by a delimiter character; facilitates the population of authority files and name/place indexes, as well as creating links between different documents sharing the same entities.
Date extraction
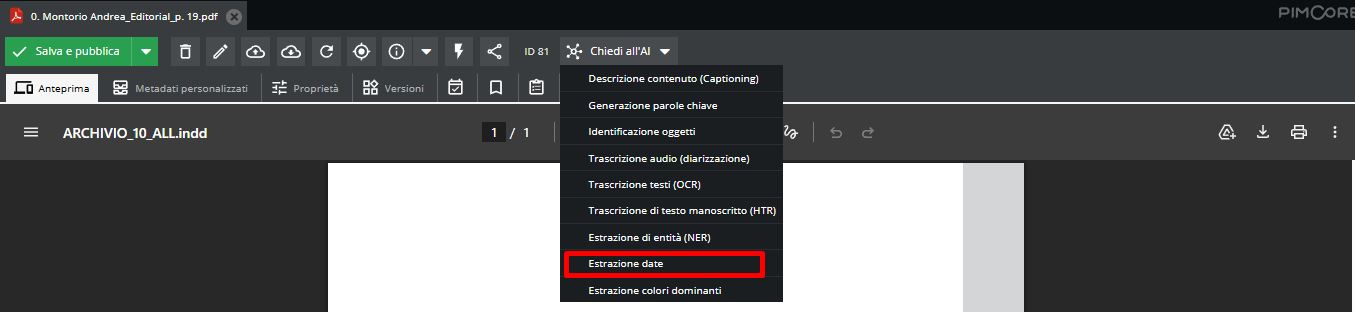
Automatically identifies chronological references in a text or digitized document and normalizes them into a standard format (for example ISO 8601); facilitates determining the date range of a documentary unit or file, improving the accuracy of temporal metadata.
Dominant color extraction
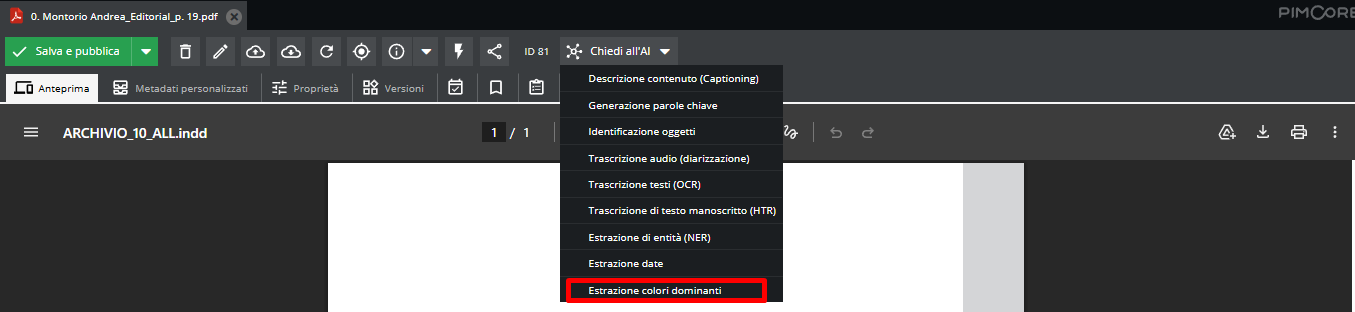
Analyzes the image to identify its prevailing chromatic frequencies, returned as color codes (HEX or RGB); useful for preservation purposes to monitor substrate deterioration over time, or for iconographic searches based on aesthetic and formal criteria.
How it works
Upon selecting a function, the system displays a request in progress indicator while querying the external service; once processing is complete, a confirmation notification appears and, switching to the Custom Metadata tab, the result appears in the corresponding row.
The value is editable: clicking on it opens a text area where the cataloger can correct or integrate the content before saving; until saved, the row remains highlighted according to the same graphic convention used elsewhere in the system to indicate unsaved changes.
Rows in custom metadata should not be filled in manually because once the AI action is launched, the text will be overwritten.
In the case of the "captioning" feature, the description result will also be visible in the descriptive card with which the media file is associated.
Credit monitoring (AI Usage)
The use of “Ask AI” functions is subject to a credit (token) counting system, which can be monitored at any time via the dedicated icon in the left sidebar.
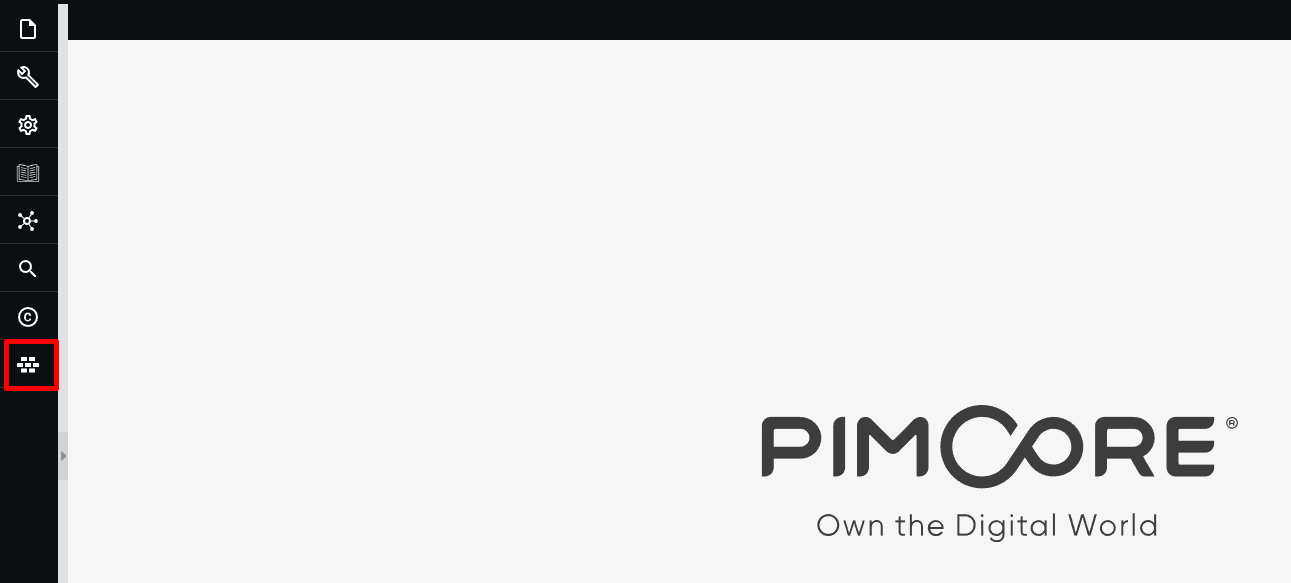
The default activated package provides 5,000 credits per month. For customized solutions with higher credit packages, the threshold must be agreed upon and specified during the platform activation and configuration phase.
Clicking the icon opens the "AI Usage" pop-up, showing consumption for the current month.
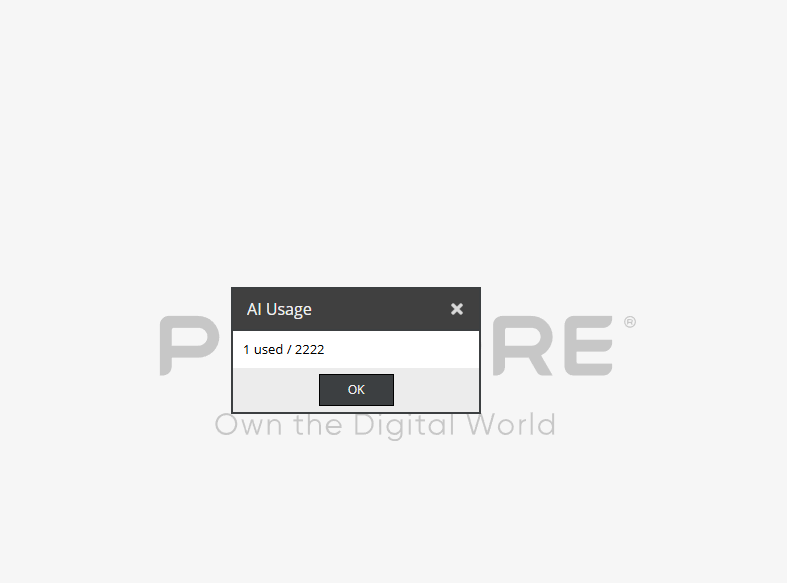
If credits run out before the end of the month, the AI features lock, generating an error message. The count automatically resets on the first day of each month.
Bulk operations: description, tagging, and export
Double-clicking a media folder allows you to view its content.
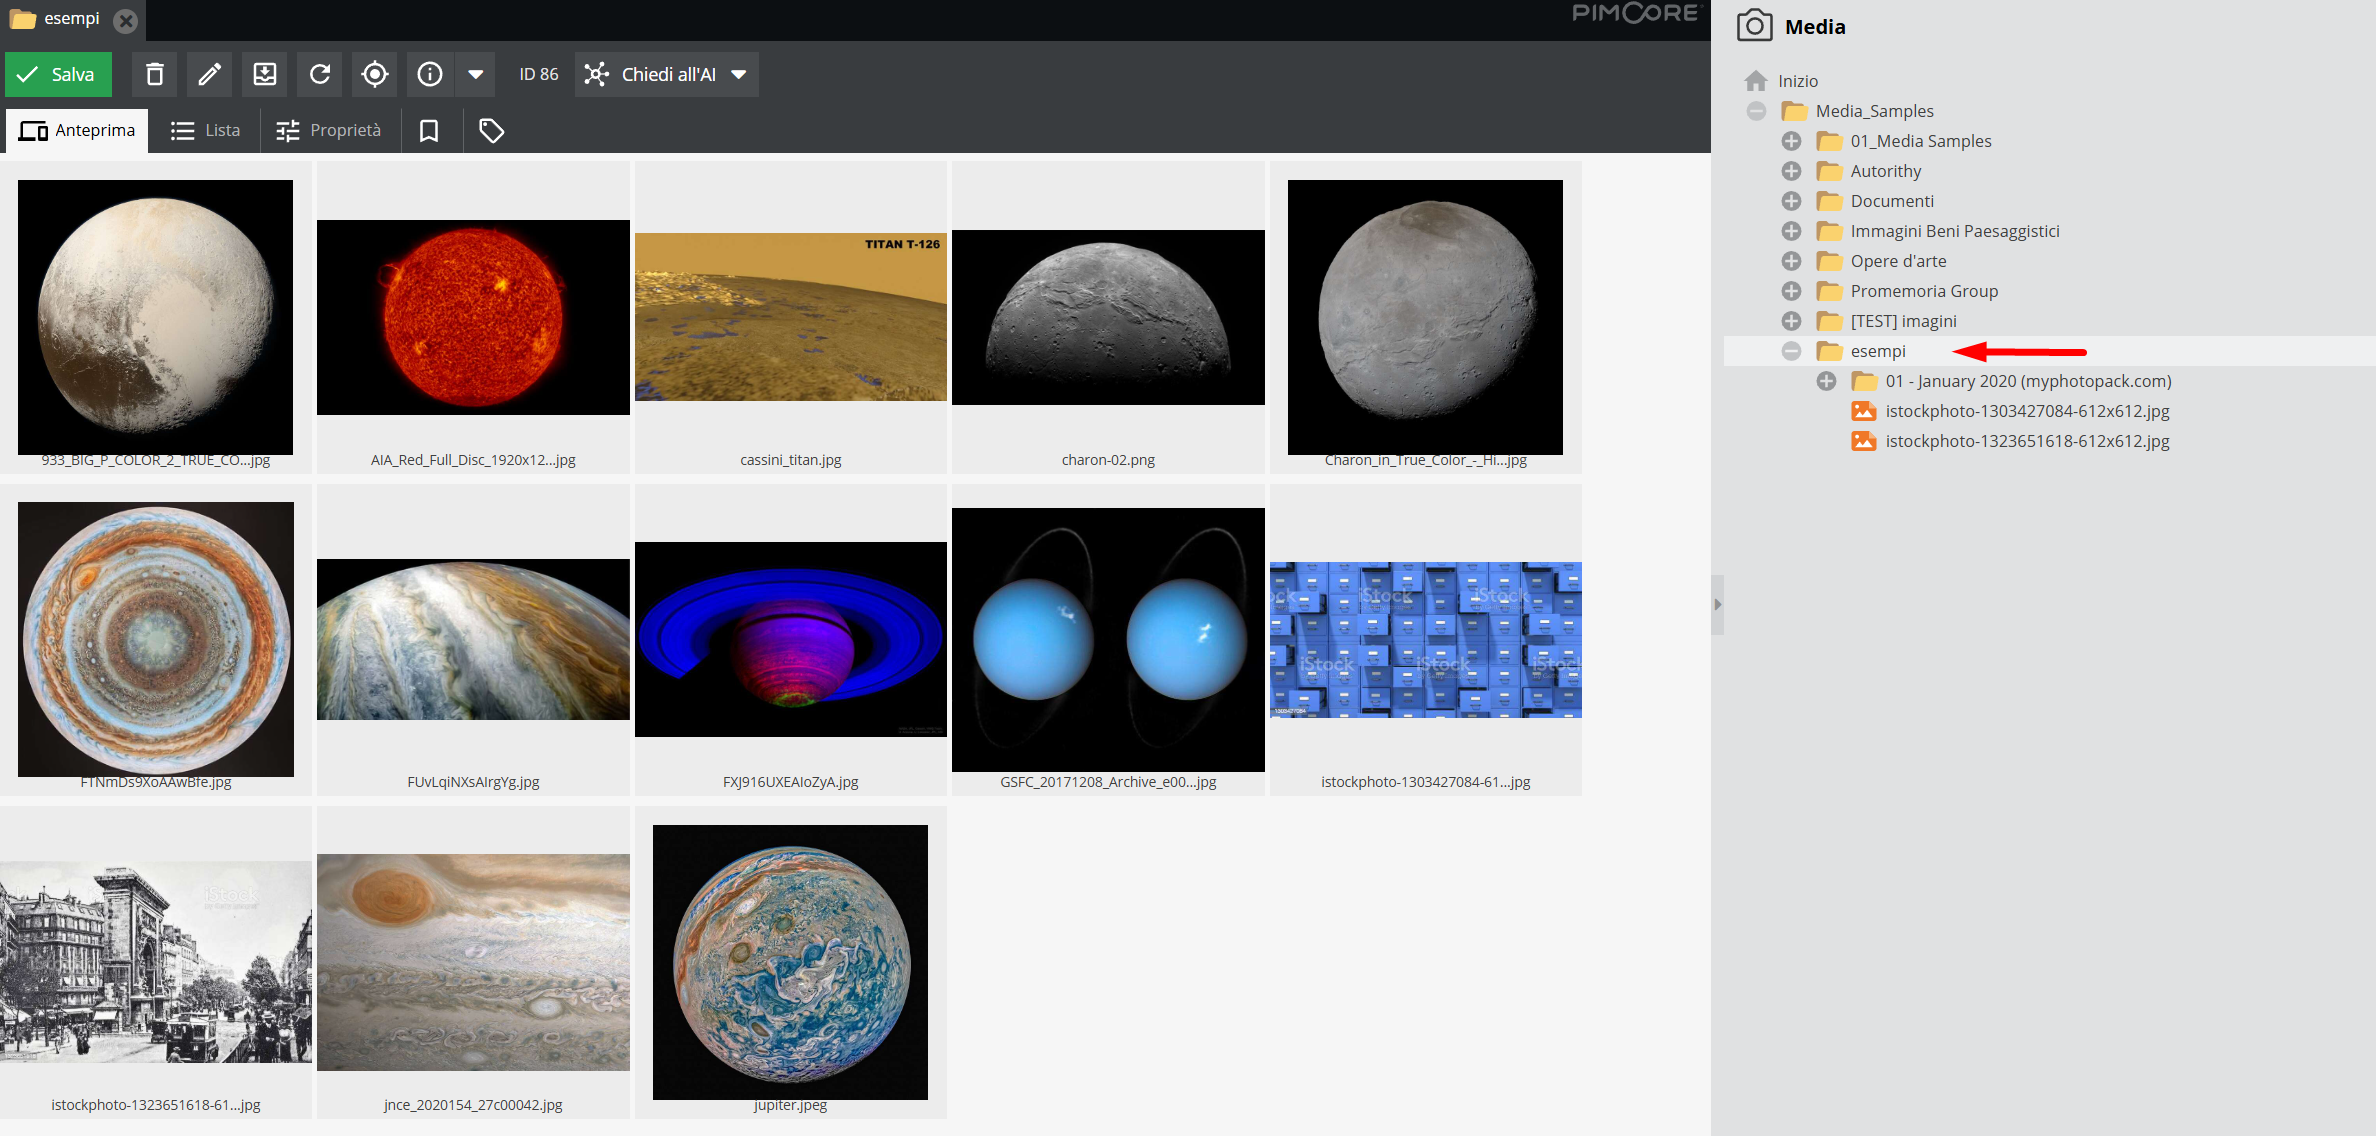
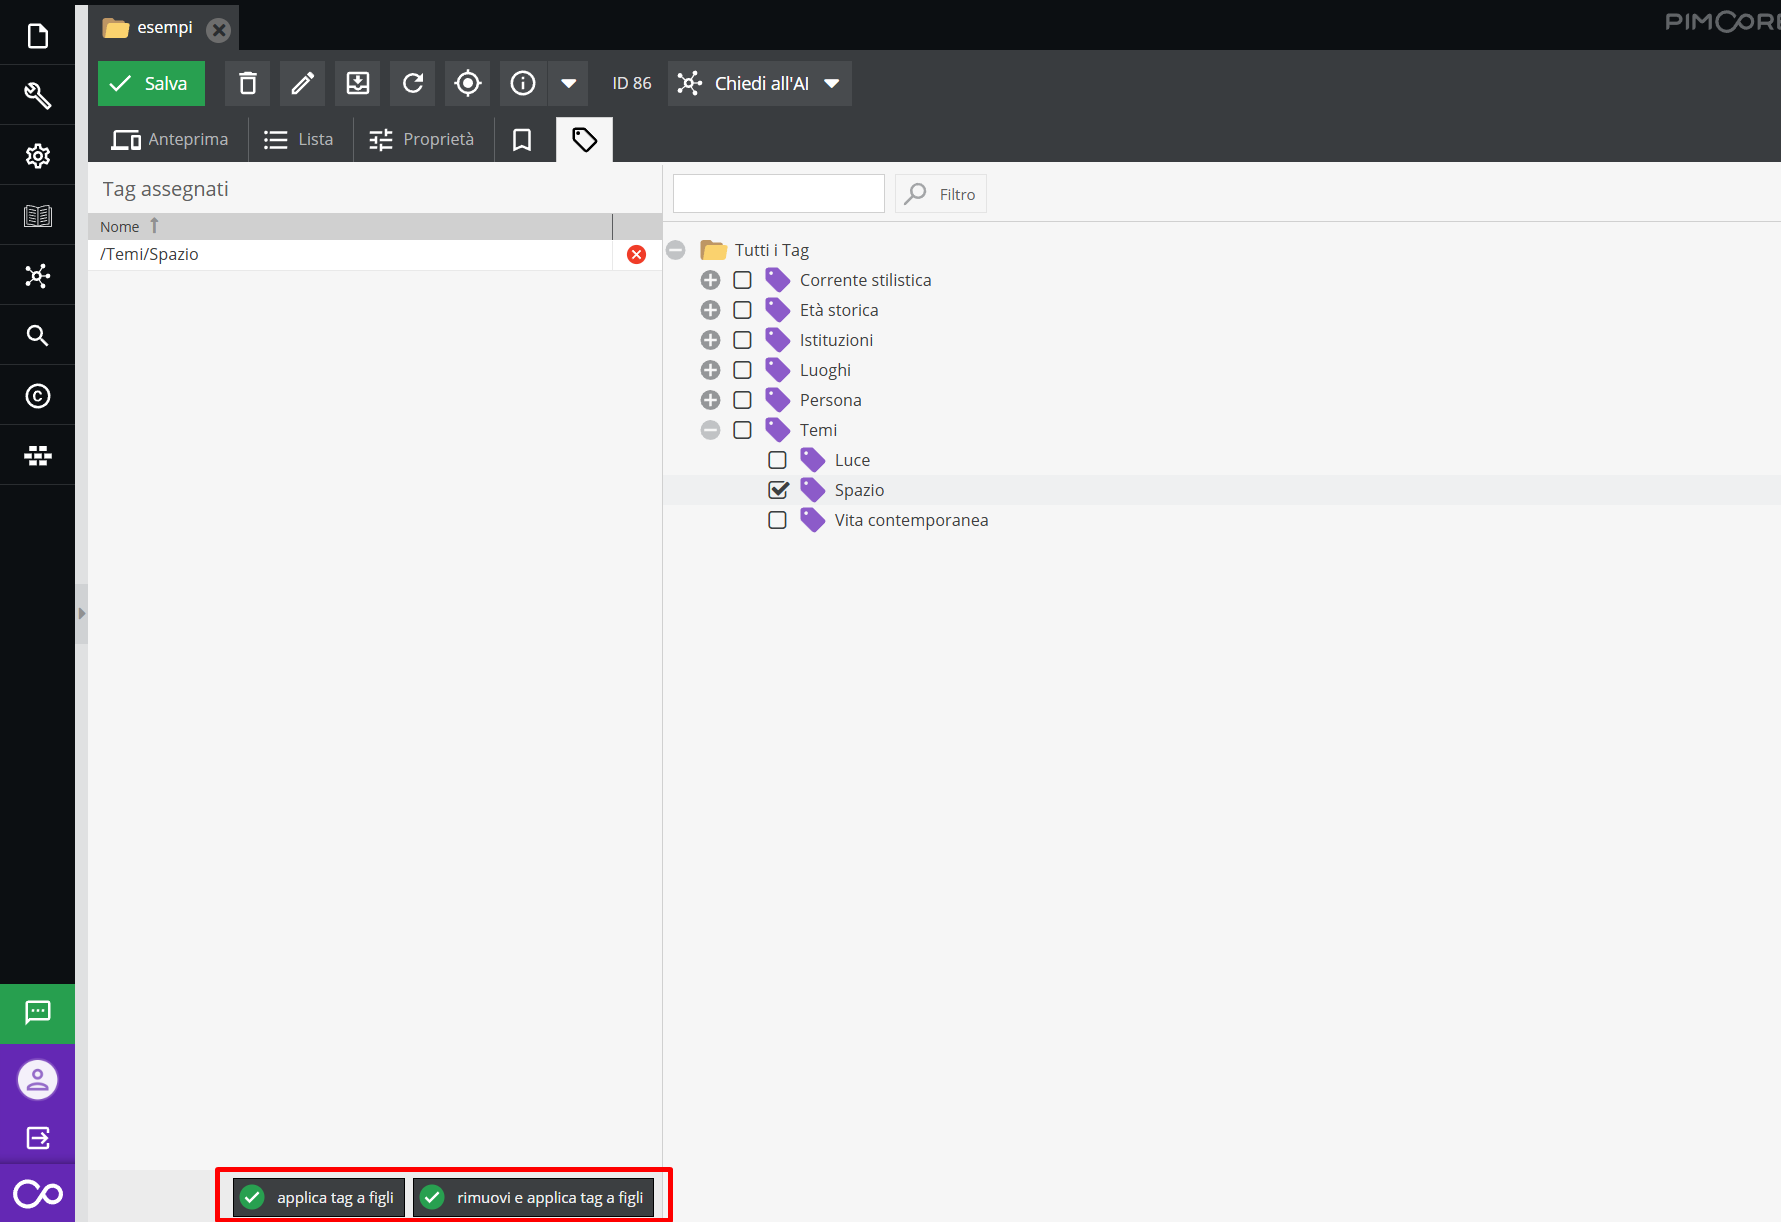
By going to the tagging tab, the user can assign search keywords to the entire folder.
To extend these attributes to the media files contained within it, the following commands are available:
- Apply tags to children propagates folder tags to all underlying media files, adding them to any already present
- Remove and apply tags to children clears pre-existing tags on media files, replacing them entirely with those assigned to the parent folder.
Clicking on the List tab sets a tabular view of the folder contents, enabling the user to perform bulk description operations.
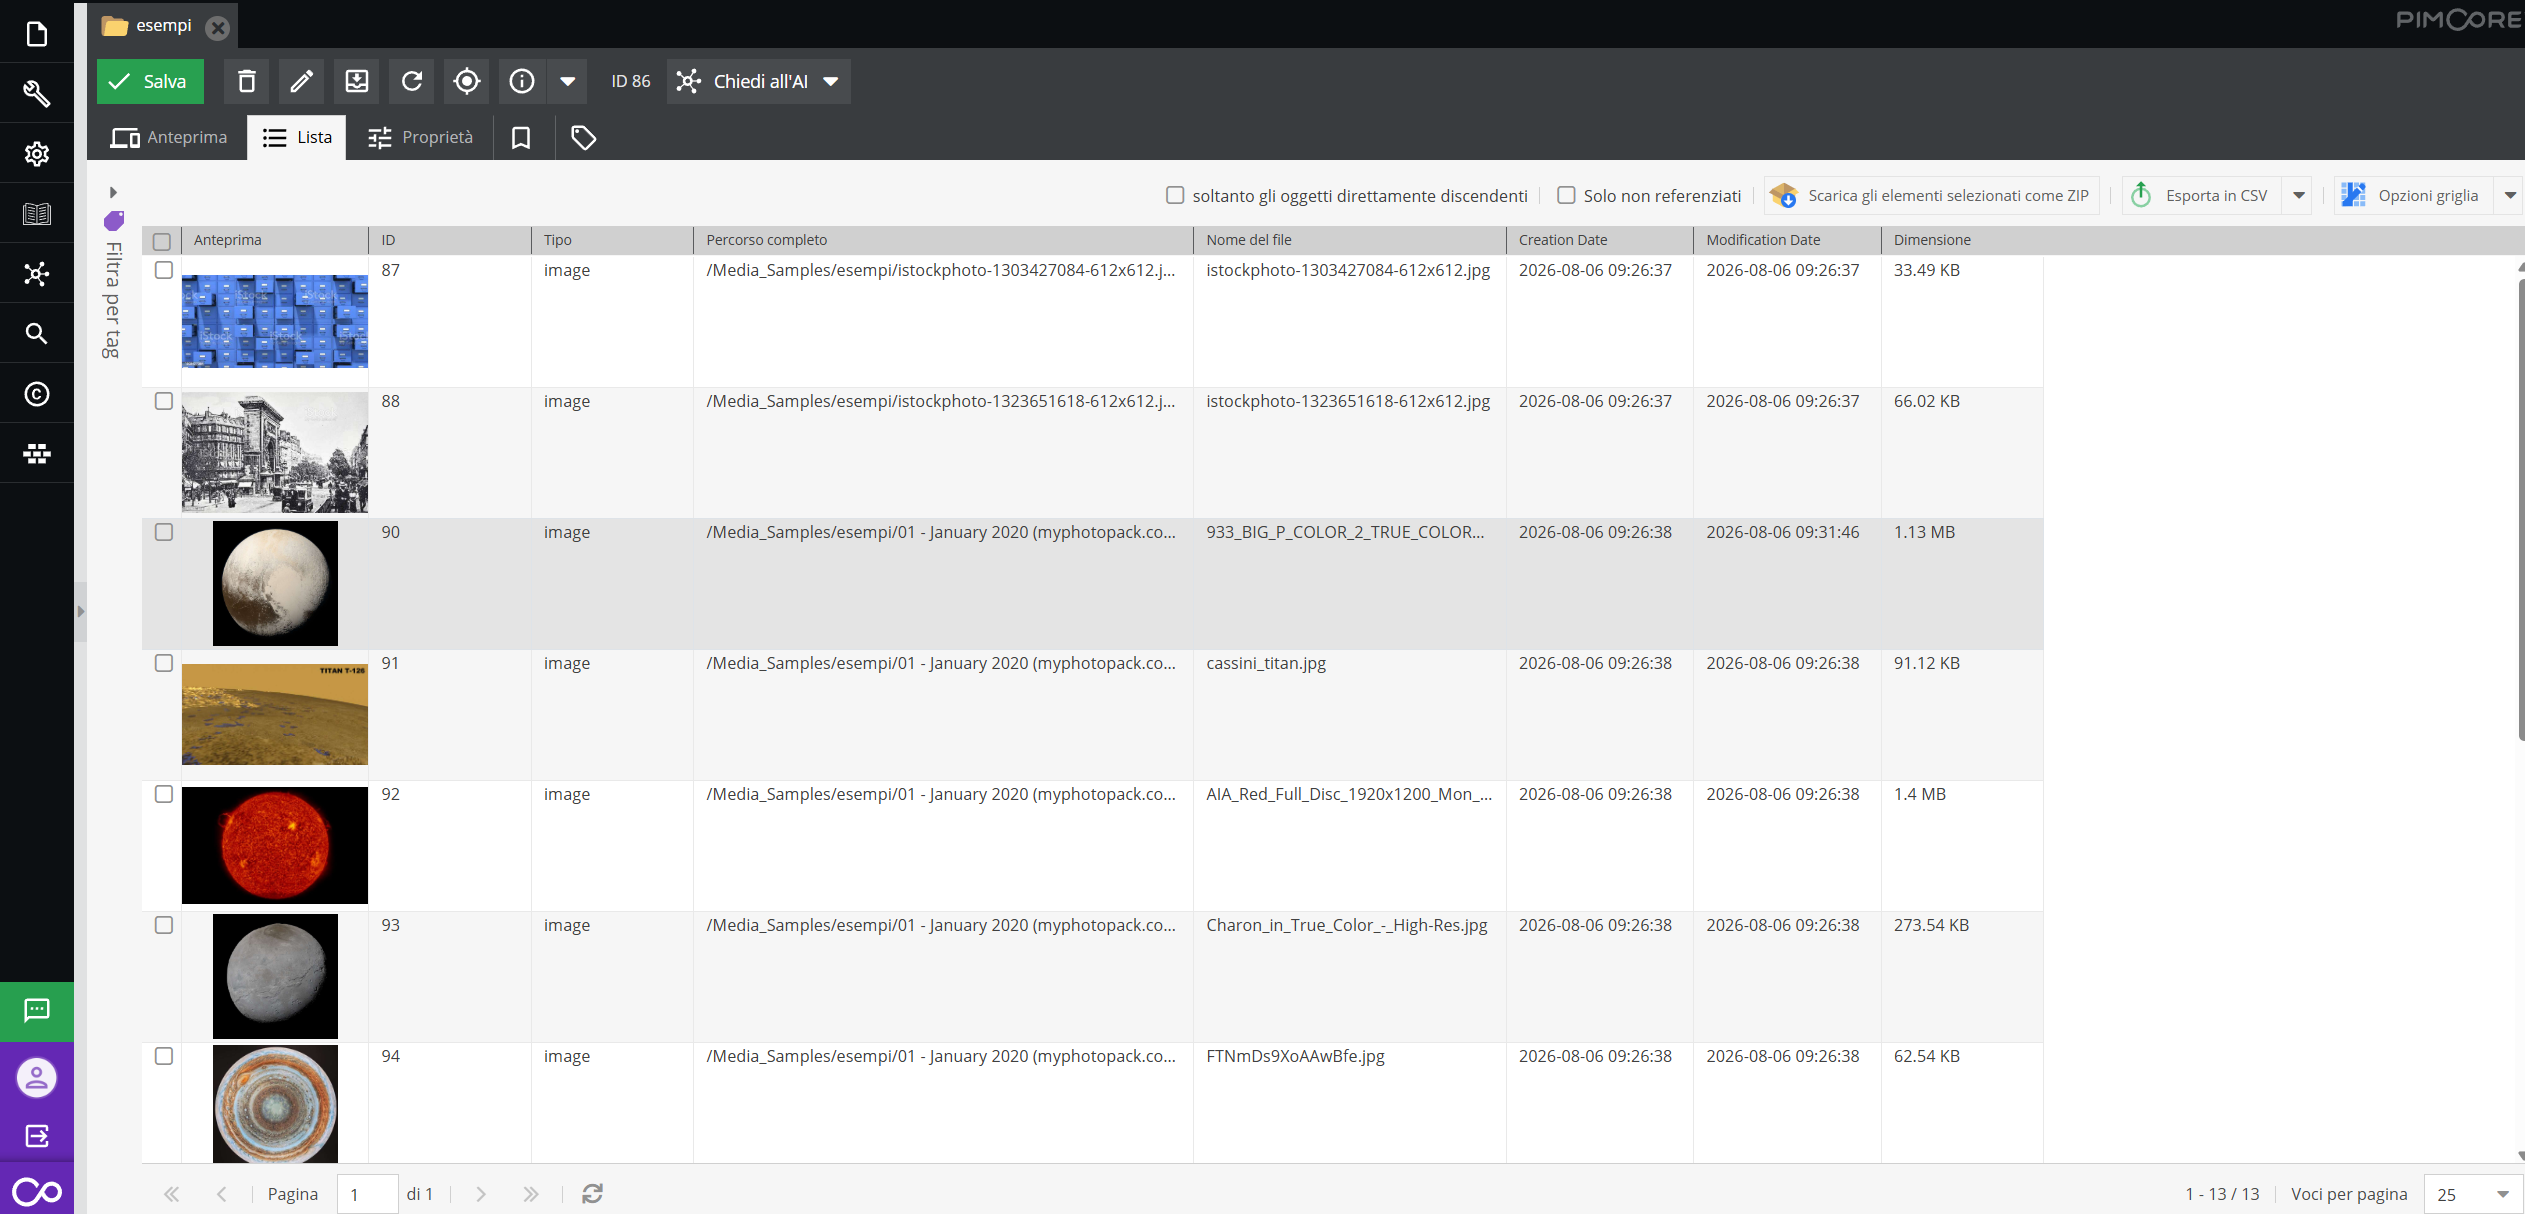
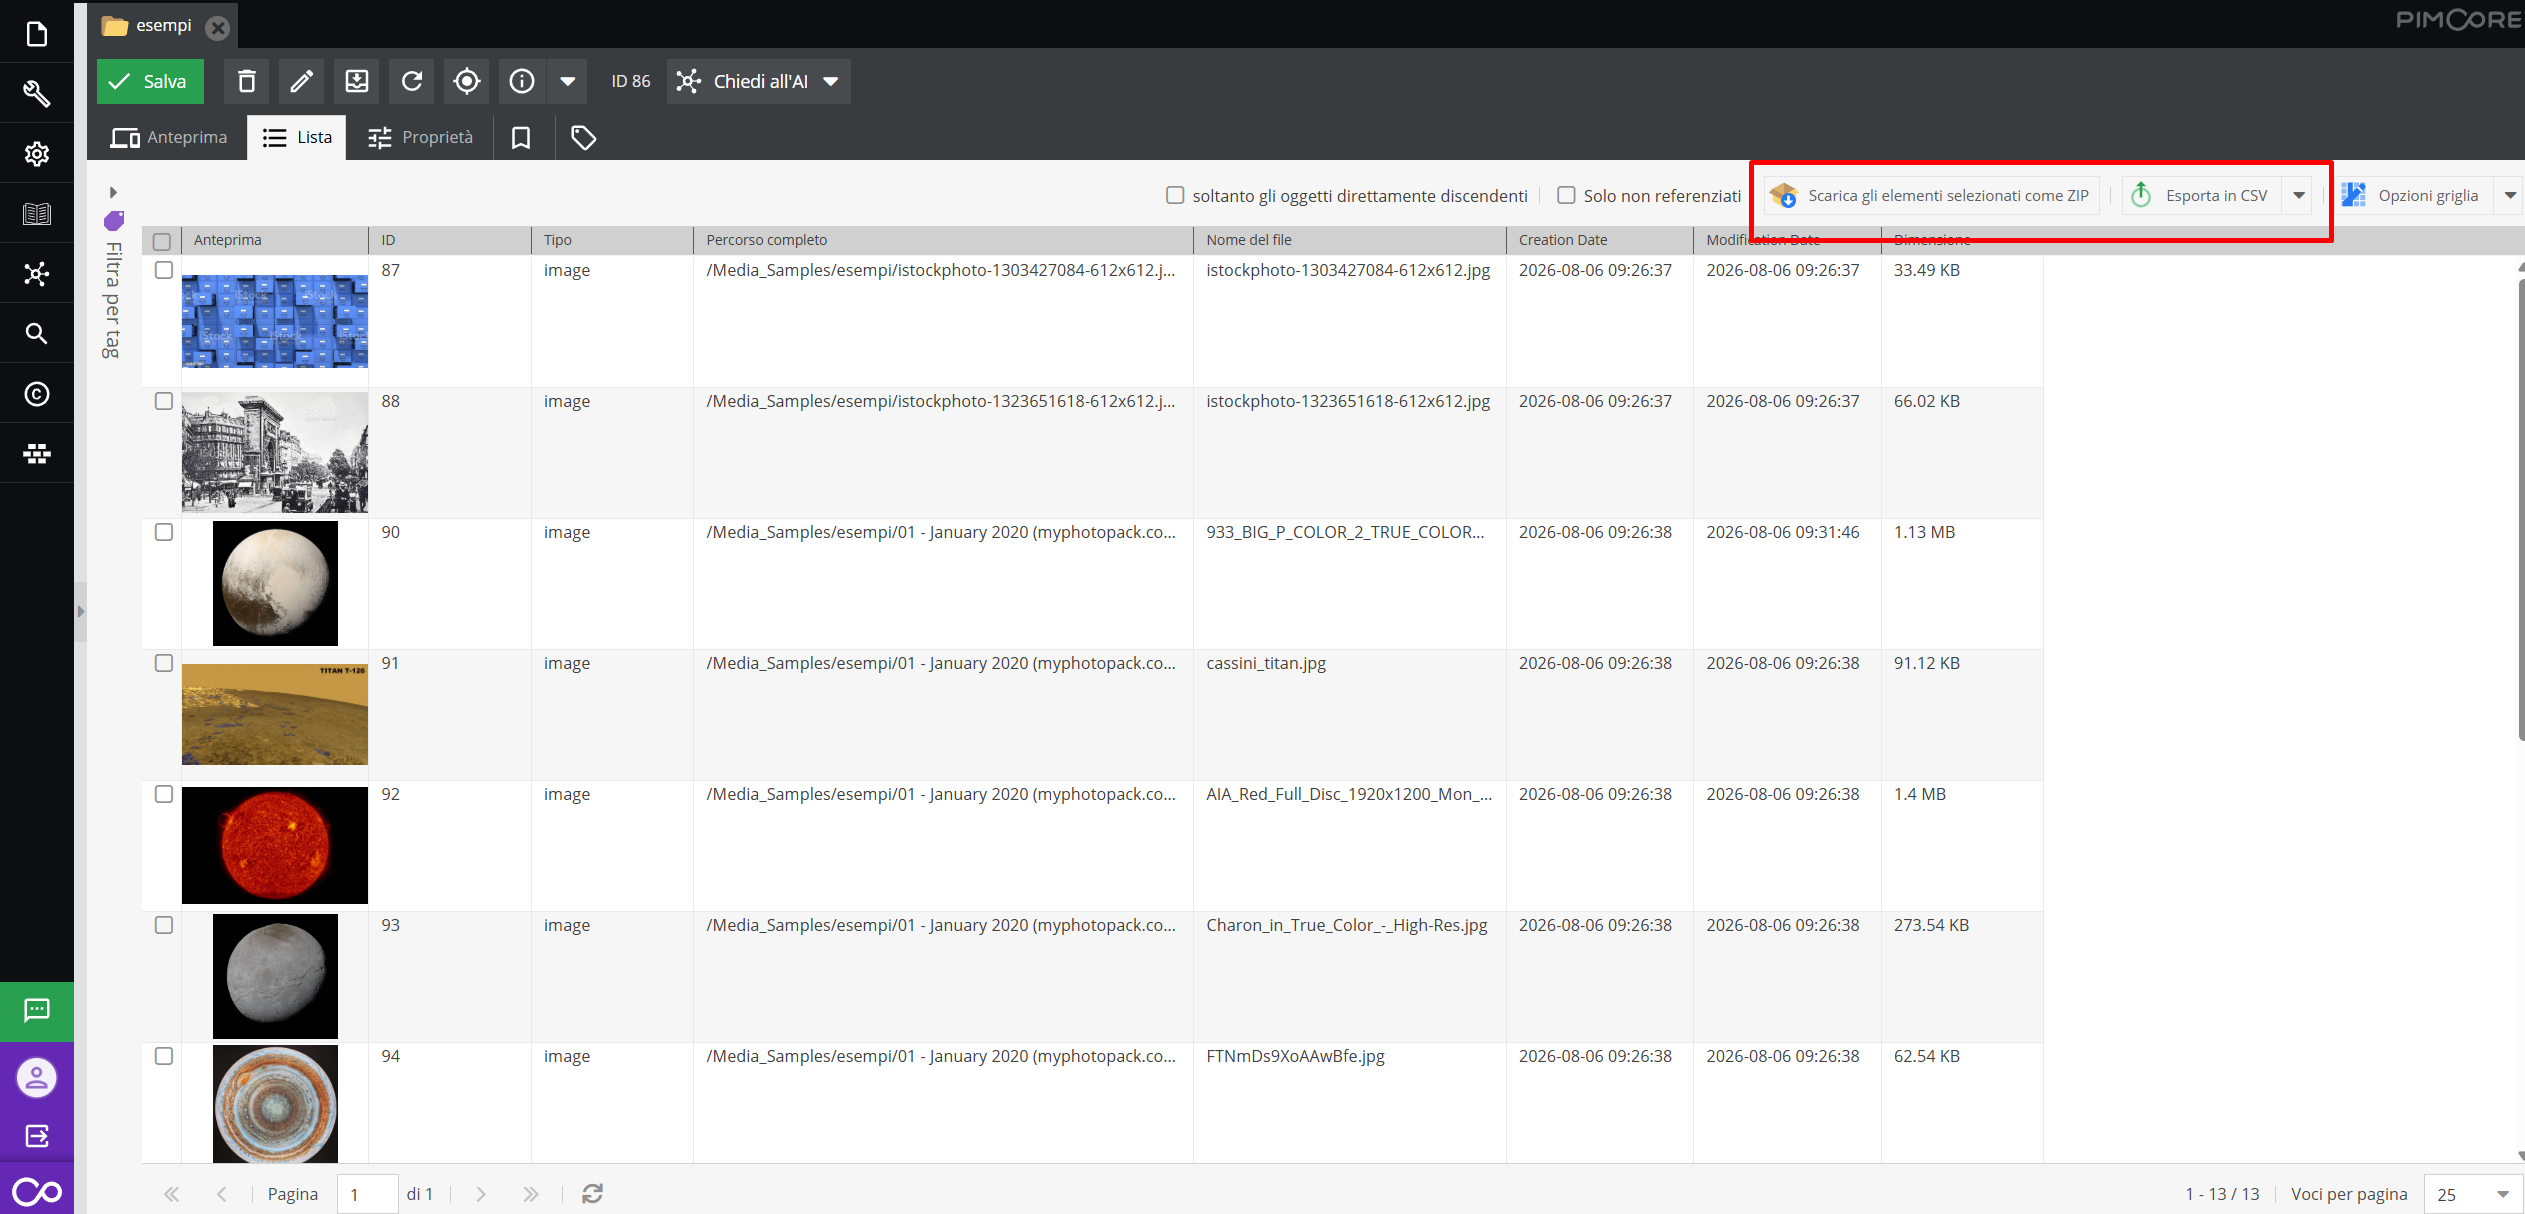
From here, you can also export selected media files in zip format or export a csv list of all media files.
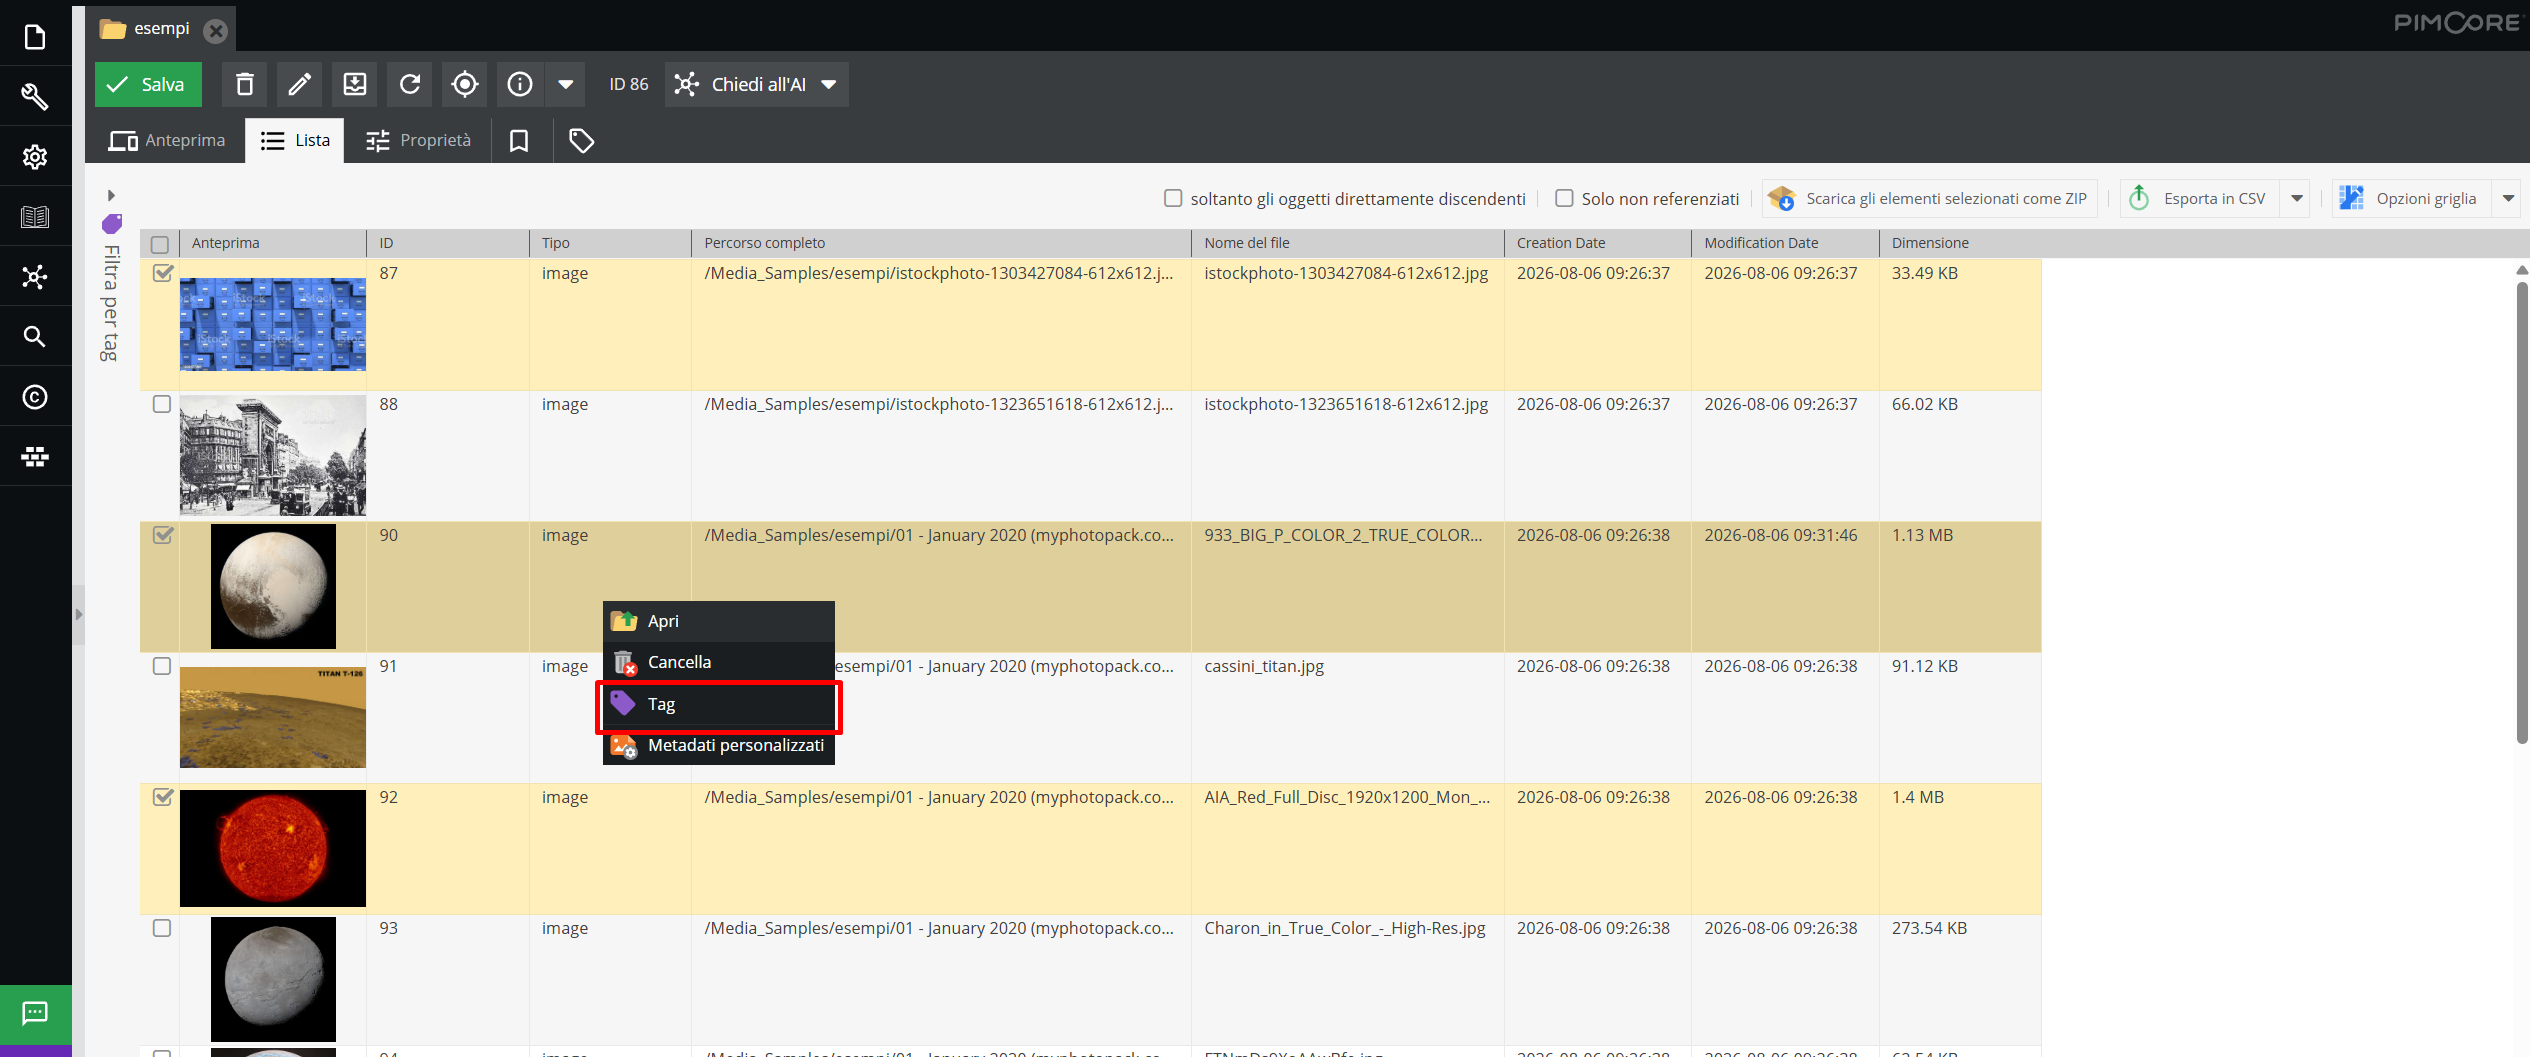
By selecting images and right-clicking near the checkboxes, you can tag the selected images.
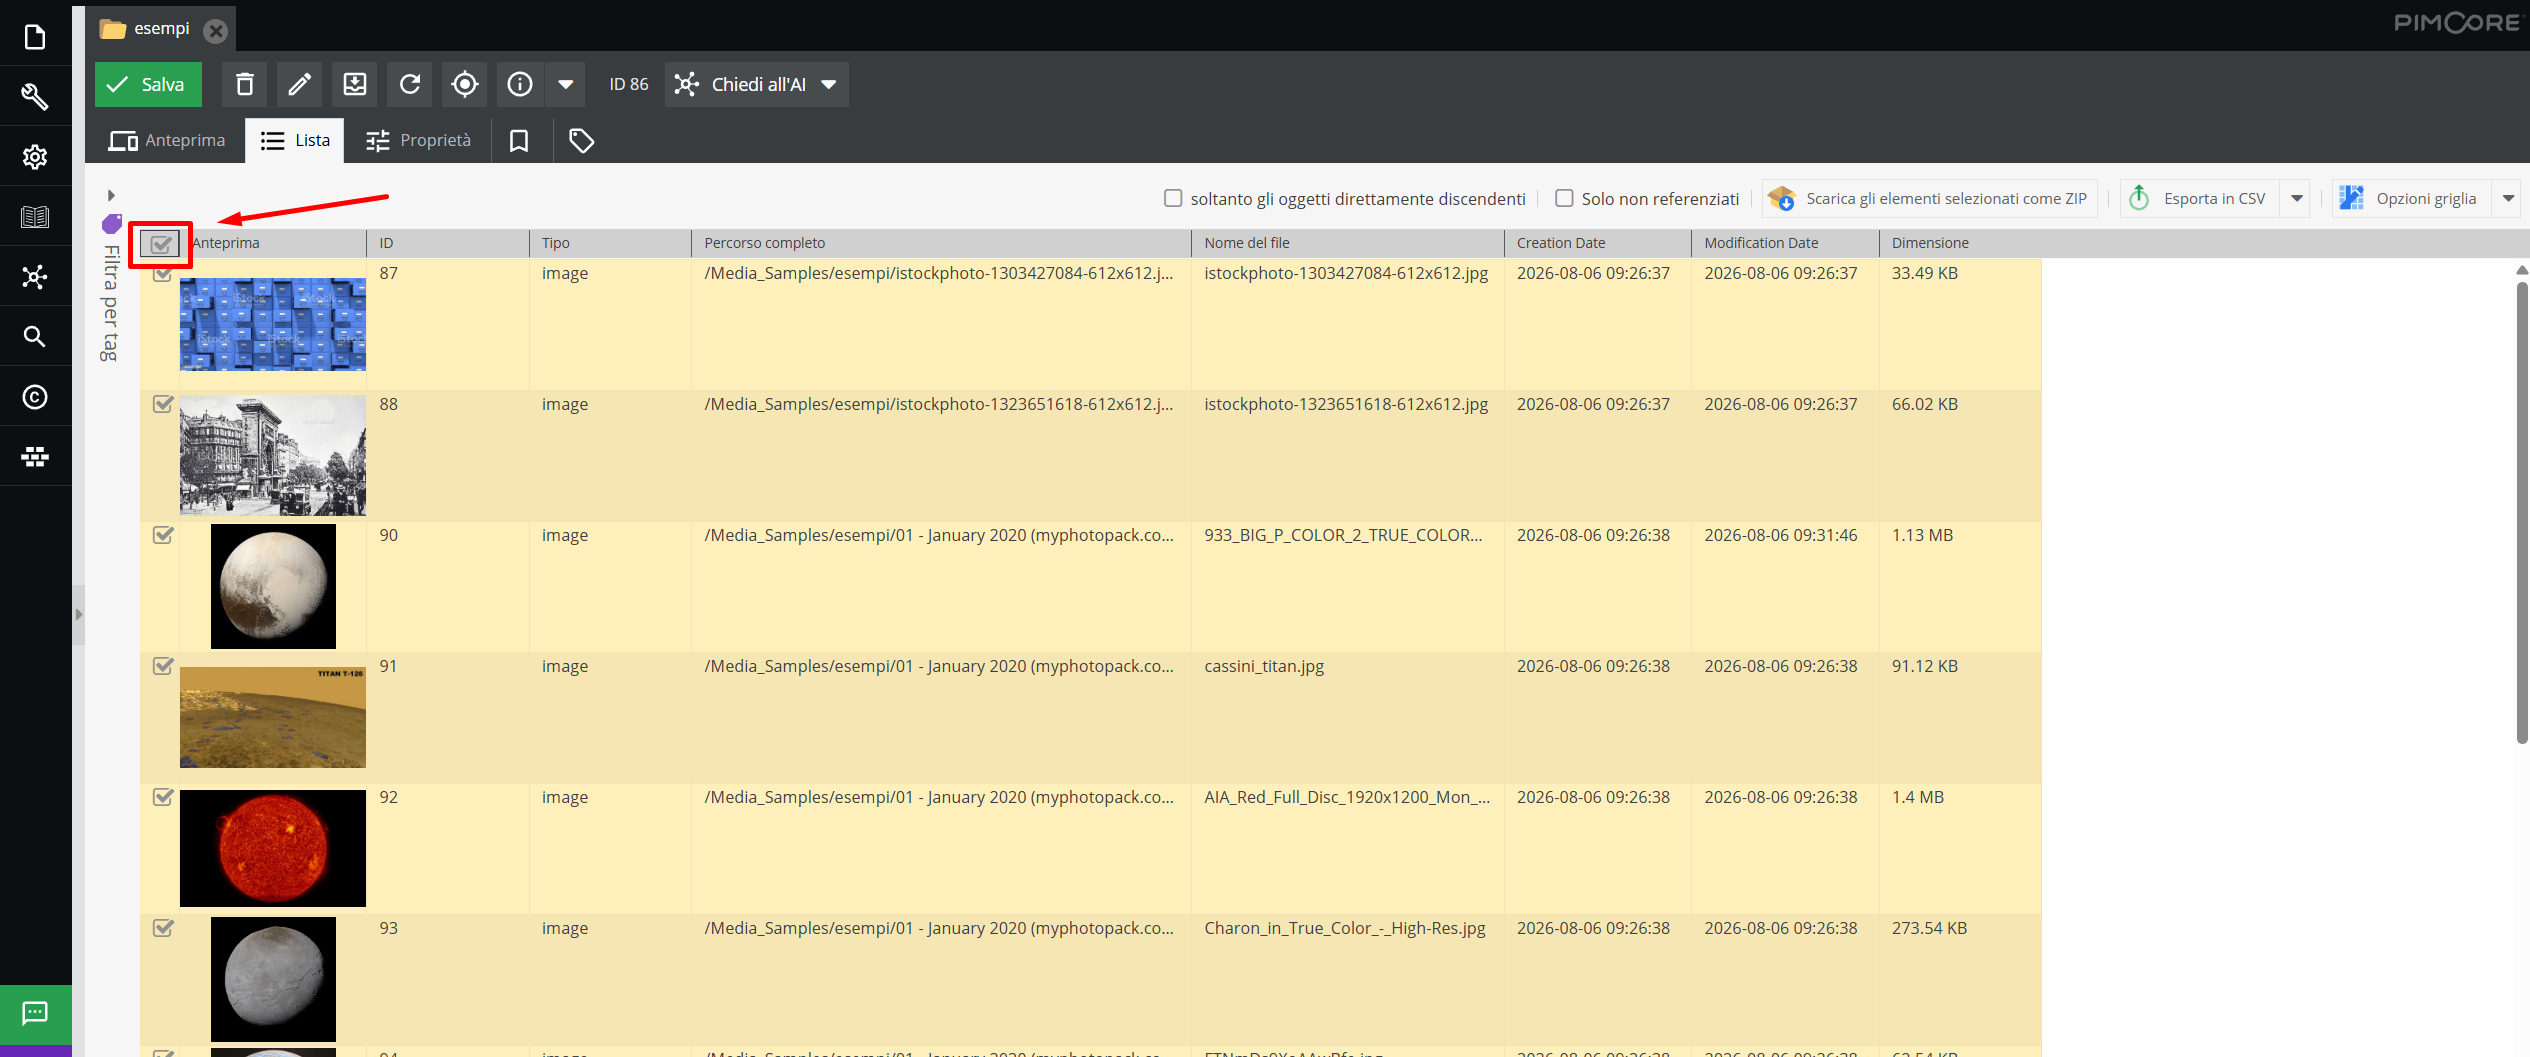
You can also select all media files in the grid and apply tags to all items.
METS-ECOMiC format export
The menu includes the “Export METS-ECOMiC” feature. This option — configurable upon Customer request — allows generating a standardized information package that “encapsulates” the digital object along with its metadata.